[page currently under reconstruction]


Tuesday, October 31, 2006

Checkerboard Cookies

I first saw these cookies on Martha Stewart's website and became intrigued. I thought they looked like a lot of trouble and stashed the idea in the back of my mind. I volunteered to make cookies for the Fall Festival at my church and decided to give these a try. Yes, indeed, they are a bit of trouble. I think if you were making several batches at once, it would be much more efficient. However, the results were rather visually appealing (though perhaps not as perfect as Martha's). I didn't have Dutch process cocoa powder, so the flavor was a bit off (according to my husband). However, I think the kids will enjoy them nonetheless.
Checkerboard Cookies
1 cup (2 sticks) unsalted butter, softened
1/2 cup sugar
1 teaspoon vanilla extract
1/4 teaspoon lemon extract
1/4 teaspoon salt
2 1/2 cups sifted all-purpose flour
3 tablespoons Dutch-process cocoa powder
1 large egg

In the bowl of an electric mixer fitted with the paddle attachment, cream butter and sugar until well blended, 1 to 2 minutes. Add vanilla extract, lemon extract, and salt. With mixer on low speed, gradually add flour, scraping down sides of bowl.

Turn dough out onto a clean work surface; it will be loose and crumbly. Knead dough by pushing small amounts away from you with the heel of your hand for 1 to 2 minutes. Divide dough in half. Sprinkle cocoa powder over one of the halves. Knead until cocoa has been fully incorporated. (This step can be avoided if making two batches; just add cocoa to one batch and leave the other plain.)

Place each half of the kneaded dough between two sheets of plastic. Using a rolling pin, shape dough into two 7-inch squares, about 3/8 inch thick. Using a sharp knife and a ruler, slice each square into nine 3/4-inch-wide strips.

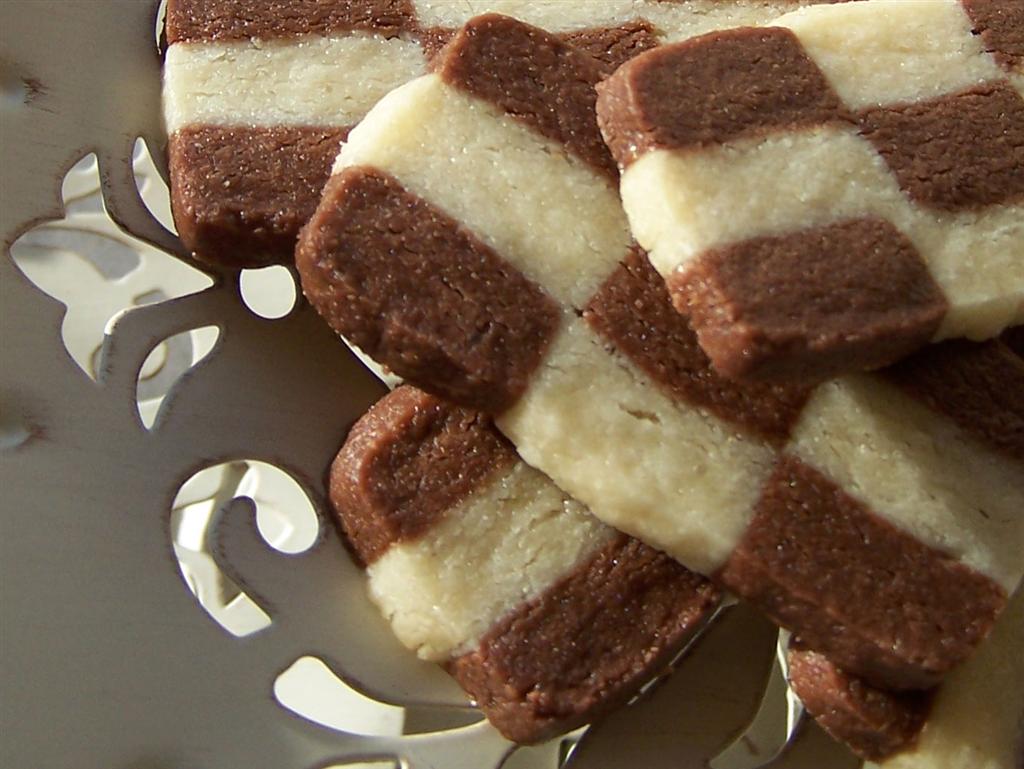
Whisk together the egg and 1 tablespoon water. Cover work surface with plastic wrap. Place three strips of dough on plastic, alternating white and chocolate strips. Brush tops and in between the strips with egg wash. Gently press strips together. Repeat, forming second and third layers, alternating colors to create a checkerboard effect. Wrap assembled log in plastic. Repeat process for second log, reversing color pattern. Refrigerate 30 minutes, or freeze 15 minutes.

Preheat oven to 350F; line a baking sheet with a silicone baking mat or parchment paper. Slice each log into 1/4-inch-thick slices; place on baking sheet. Bake until done, 10 to 12 minutes. Remove baking sheet from oven, and let cookies cool 2 minutes. Transfer cookies to a wire rack to cool completely.

Tuesday, October 24, 2006

Mini Vacation

No recipes this week as I'll be out of town for most of it. Back on the 31st!

Thursday, October 19, 2006

Buttercream Icing

Great for decorating cakes, this recipe is straight from Wilton.

1/2 cup solid vegetable shortening
1/2 cup butter or margarine*
1 teaspoon Clear Vanilla
4 cups sifted confectioners' sugar (approx. 1 lb.)
2 tablespoons milk**

Cream butter and shortening with electric mixer. Add vanilla. Gradually add sugar, one cup at a time, beating well on medium speed. Scrape sides and bottom of bowl often. When all sugar has been mixed in, icing will appear dry. Add milk and beat at medium speed until light and fluffy. Keep icing covered with a damp cloth until ready to use. For best results, keep icing bowl in refrigerator when not in use. Refrigerated in an airtight container, this icing can be stored 2 weeks. Rewhip before using.

YIELD: 3 cups

*Substitute all-vegetable shortening and 1/2 teaspoon Wilton No-Color Butter Flavor for pure white icing and stiffer consistency.

**Add 2 tablespoons light corn syrup per recipe to thin for icing cake.

Tuesday, October 17, 2006

Wedding Cake

Sorry, no recipe today. Instead, I thought I'd share some photos of the wedding cake I made for some friends. The cake is Carrot Cake with Buttercream Icing. There were two and a half 11x15 inch sheetcakes (2 layers) in addition to these cakes, too.


The wedding was beautiful...congratulations Mr. & Mrs. Smith!

Thursday, October 12, 2006

Ravioli Cookies

It's a silly name, I know, but they received rave reviews from coworkers. And, they're easily customizable to suit any taste. Since I don't like chocolate, I haven't actually tried one of these cookies, but I am planning to try these with white chocolate. I'll post how they turn out.

Basic Sugar Cookie Dough
Rolling Pin
Waxed or Parchment paper
Pizza Cutter
Hershey's Miniatures

Unwrap the Hershey's Miniatures and break each bar in half.

Roll out the sugar cookie dough between sheets of waxed or parchment paper to 1/8 inch thick. Use the pizza cutter to cut 2-inch squares. Place one half of a chocolate in the middle of every other square. Carefully flip the adjacent square onto the chocolate and press the dough down around it, removing air bubbles. (Air bubbles are bad and can cause the sides to "blow out", similar to normal ravioli.) Seal the edges with the tines of a fork. Transfer cookies to a parchment-lined baking sheet (or use a silicone-lined baking sheet). Bake at 325F for 15-20 minutes, or until golden. Remove immediately to a cooling rack. Serve with milk. :)

Tuesday, October 10, 2006

Chickpea Crisps

I first saw this recipe on Martha Stewart. She called them "Paprika Chickpeas," but I felt that title was rather bland for such a recipe. They remind me of Corn Nuts, though MUCH better and not nearly as salty. I used the pimenton I received from Bri via Blogging By Mail, and it lends a nice, smokey flavor to this snack. I haven't yet tried it with other spices, but I'm sure a cajun or curry flavor would be delicious as well. *Update: Anne has already tried other spices with excellent results.* They're addictive, so you may want to double the recipe; just be sure to use 2 pans.

2 cans (~15 oz each) chickpeas (garbanzo beans)
3 Tbsp. olive oil (I used 2 and it was plenty)
1 1/2 tsp. coarse salt (or 1 tsp. table salt)
1 tsp. pimenton (smoked paprika)

Preheat the oveb to 400F. Drain the chickpeas and dry thoroughly. Put into a bowl (plastic bags work well, too) and coat the beans with olive oil. Spread onto a baking sheet (1 layer) and bake for 30-40 minutes or until golden brown, tossing every 5-7 minutes. Remove the pan and sprinkle with salt and spice; shake to coat. (I put them into a bowl - it's easier to coat them evenly.) Bake another 2-3 minutes. Cool on a paper towel lined plate and enjoy!

Thursday, October 05, 2006

Caramels

1/2 cup butter
2 cups firmly packed brown sugar
1 cup light corn syrup
Dash salt
1 (14-ounce) can sweetened condensed milk
1 teaspoon vanilla

Melt butter in 2-quart saucepan; add brown sugar, corn syrup and salt. Cook over medium
heat, stirring occasionally, until mixture comes to a full boil (10 to 12 minutes). Stir in sweetened condensed milk. Continue cooking, stirring occasionally, until small amount of mixture dropped into ice water forms a firm ball or candy thermometer reaches 250°F (25 to 30 minutes). Remove from heat; stir in vanilla. Pour into prepared dish. Let cool completely. Remove from dish using parchment, and cut into sqares.

Recipe adapted from Land O' Lakes.

Tuesday, October 03, 2006

Fruit Roll Cookies (Low Sugar)

1 cup margarine, softened
8 oz regular or reduced fat cream cheese, softened
3 cups all-purpose flour
1/2 tsp. salt
1 Tbsp. sugar
10 oz all-fruit preserves (no sugar added)

In a large mixing bowl, combined margarine and cream cheese; beat until well blended. Gradually add flour, sugar, and salt. Mix well. On a lightly floured surface, shape into a ball or log; cover with plastic wrap and chill for an hour for easier handling.

Preheat oven to 350F. Divide dough into 3 equal parts. On floured surface, roll each section of dough into a rectangle approximately 8x14 inches. Spread ~1/3 of the preserves on the dough. Roll up jelly roll style, beginning with one of the longer sides. Using a sharp knife, slice into half inch slices. Bake, flat side down, on a parchment lined cookie sheet about 1/2 inch apart, for 25-30 minutes or until lightly golden.