Wow...I didn't realize it had been so long since I last posted. Time flies when you have a little one. :)
So, in an attempt to have a quick, hearty, and yummy meal, here's what I've come up with. Simple, scrumptious, and speedy. (Not to mention only one skillet to clean!) Yum.
Banana Nut Pancakes
2 cup Bisquick
2 eggs
1 cup milk
3 ripe bananas, mashed
1/2 to 3/4 cup chopped nuts (I used pecans, but walnuts would also be good)
Olive oil (or butter) for frying
Maple syrup for serving
Toast nuts in a dry skillet over medium heat for a few minutes until fragrant.
While the nuts are toasting, mix the Bisquick, eggs, and milk. Add mashed bananas. Add toasted nuts.
Add some olive oil (or butter) to the skillet (still over medium heat) and pour batter into ~4-inch circles (or whatever size you happen to like). Cook until golden, brown, and delicious on both sides, and enjoy with real maple syrup.

Sunday, March 09, 2008
Wednesday, February 13, 2008
Italian Dressing Mix
I wanted some Italian Dressing for a marinated salad, but I realized that I didn't have any on hand. So, I found out how to make my own, and it's much better than what I used to buy. :)
Italian Dressing Mix
1 Tbsp garlic salt
1 Tbsp onion powder
1 Tbsp white sugar
2 Tbsp dried oregano
1 tsp ground black pepper
1/4 tsp dried thyme
1 tsp dried basil
1 Tbsp dried parsley
1/4 tsp celery salt
1 Tbsp salt
In a small bowl, mix together the above ingredients. Store in a tightly sealed container.
To make the Dressing:
2 Tbsp dry mix
1/4 cup white vinegar
2 Tbsp water
2/3 cup canola or olive oil (or a combination)
Grated parmasean, ~ 2 Tbsp, or to taste
To prepare dressing, whisk the dry mix with vinegar and water. Let sit for 5 minutes. Then, whisk in oil. Add some grated parmasean and serve.
From AllRecipes
Italian Dressing Mix
1 Tbsp garlic salt
1 Tbsp onion powder
1 Tbsp white sugar
2 Tbsp dried oregano
1 tsp ground black pepper
1/4 tsp dried thyme
1 tsp dried basil
1 Tbsp dried parsley
1/4 tsp celery salt
1 Tbsp salt
In a small bowl, mix together the above ingredients. Store in a tightly sealed container.
To make the Dressing:
2 Tbsp dry mix
1/4 cup white vinegar
2 Tbsp water
2/3 cup canola or olive oil (or a combination)
Grated parmasean, ~ 2 Tbsp, or to taste
To prepare dressing, whisk the dry mix with vinegar and water. Let sit for 5 minutes. Then, whisk in oil. Add some grated parmasean and serve.
From AllRecipes
Friday, January 11, 2008
Orzo with Roasted Garlic, Red Peppers, & Spinach
I know it's not a clever title, but it was delicious! In fact, there weren't any leftovers at all. I got the idea from a side dish we had at Macaroni Grill, but I think mine was better. (Hey, my husband said it was "restaurant quality.") :) This recipe should feed 4, but if you're really hungry (like we were), it will only be enough for 2. Of course, it can easily be doubled as well.
1/2 box orzo pasta, cooked & drained
1 Tbsp. olive oil
1 Tbsp. roasted garlic, minced or smashed into a paste consistency
2 to 3 Tbsp. roasted red peppers,julienned
1 cup spinach, large chiffonade
In a saute pan, warm the olive oil and roasted garlic on low heat for a couple of minutes. Then, turn the heat up to medium/medium-low and add the roasted red peppers. Stir to combine. Add the drained orzo and stir to coat pasta. Just before serving, add the spinach, stir to combine, and serve.
1/2 box orzo pasta, cooked & drained
1 Tbsp. olive oil
1 Tbsp. roasted garlic, minced or smashed into a paste consistency
2 to 3 Tbsp. roasted red peppers,julienned
1 cup spinach, large chiffonade
In a saute pan, warm the olive oil and roasted garlic on low heat for a couple of minutes. Then, turn the heat up to medium/medium-low and add the roasted red peppers. Stir to combine. Add the drained orzo and stir to coat pasta. Just before serving, add the spinach, stir to combine, and serve.
Friday, January 04, 2008
Roast Chicken Rub
**Updated**
I've been roasting a lot of food recently...potatoes, green beans, carrots, onions, chicken, etc., etc. It's tasty and incredibly easy. I tried a rub last night on some roasted chicken, and it was fantastic. The original recipe is for a make-at-home rotisserie chicken, but I just had leg quarters, and it worked great. I also used smoked paprika instead of sweet paprika, but either would be fine. I lifted the skin and put the rub on the meat as well as on top of the skin before drizzling with olive oil to roast. Delicious!
*Update: You'll notice there's no salt in this rub. The original called for 2 tsp. salt, but it was far too salty after I made it again. So, salt the chicken as a separate step; otherwise, it will be way too salty.*
Roast Chicken Rub
1 tsp. smoked paprika
1/2 tsp. onion powder
1/2 tsp. ground thyme
1/2 tsp. black pepper
1/2 tsp. dried oregano
1/4 tsp. cayenne pepper
1/4 tsp. garlic powder
Sprinkle on chicken skin and between skin and meat (or on skinless chicken). Drizzle olive oil over skin and roast at 400F for about 30 minutes or until done.
Original 'Rotisserie-Style Chicken' recipe from "In the Kitchen with Mary & Martha: Cookin' Up Christmas"
I've been roasting a lot of food recently...potatoes, green beans, carrots, onions, chicken, etc., etc. It's tasty and incredibly easy. I tried a rub last night on some roasted chicken, and it was fantastic. The original recipe is for a make-at-home rotisserie chicken, but I just had leg quarters, and it worked great. I also used smoked paprika instead of sweet paprika, but either would be fine. I lifted the skin and put the rub on the meat as well as on top of the skin before drizzling with olive oil to roast. Delicious!
*Update: You'll notice there's no salt in this rub. The original called for 2 tsp. salt, but it was far too salty after I made it again. So, salt the chicken as a separate step; otherwise, it will be way too salty.*
Roast Chicken Rub
1 tsp. smoked paprika
1/2 tsp. onion powder
1/2 tsp. ground thyme
1/2 tsp. black pepper
1/2 tsp. dried oregano
1/4 tsp. cayenne pepper
1/4 tsp. garlic powder
Sprinkle on chicken skin and between skin and meat (or on skinless chicken). Drizzle olive oil over skin and roast at 400F for about 30 minutes or until done.
Original 'Rotisserie-Style Chicken' recipe from "In the Kitchen with Mary & Martha: Cookin' Up Christmas"
Thursday, December 20, 2007
Cake!
I haven't been posting much because I've been busy making another wedding cake (and a groom's cake!). Here's what I've been up to. (No, I didn't do the flowers...the florist took care of that...I just did the cakes.) 

Friday, December 07, 2007
Pomegranate Vinaigrette
I don't eat as many salads as I'd like (or should). And, normally, I don't make my own dressings. However, I happened to have some pomegranate molasses, and this recipe from Bobby Flay looked too good to pass up. I was right. This is delicious on a spinach salad, especially if you add some chopped apples and toasted walnuts as suggested with the accompanying salad recipe. Very refreshing and tasty. I only made a slight modification to the amount of pomegranate molasses.
Pomegranate Vinaigrette
1/3 cup pomegranate molasses
2 tablespoons red wine vinegar
1 tablespoon Dijon mustard
1 tablespoon honey
Salt and freshly ground black pepper
3/4 cup extra-virgin olive oil
Whisk together the pomegranate molasses, vinegar, mustard, honey and salt and pepper in a medium bowl. Slowly whisk in the olive oil until emulsified.
Recipe courtesy Bobby Flay
Pomegranate Vinaigrette
1/3 cup pomegranate molasses
2 tablespoons red wine vinegar
1 tablespoon Dijon mustard
1 tablespoon honey
Salt and freshly ground black pepper
3/4 cup extra-virgin olive oil
Whisk together the pomegranate molasses, vinegar, mustard, honey and salt and pepper in a medium bowl. Slowly whisk in the olive oil until emulsified.
Recipe courtesy Bobby Flay
Monday, December 03, 2007
Chickpea Curry
This tasty dish could have come from your local Indian restaurant, but it's so simple and quick to make at home, either on the stovetop or in a crock pot/slow cooker. Since I cooked this on the stove, I smashed some of the chickpeas (probably 1/4 to 1/2 of them) to make the curry a bit thicker and less chunky. I served this over rice. Mmm...yum.

Chickpea Curry
2 Tbsp. olive oil
1 onion, diced
2 cloves garlic, minced
1 inch ginger, grated
1 tsp. cumin
1 tsp. coriander, crushed
1 tsp. turmeric
1 tsp. salt
15 oz. can chickpeas
15 oz. can diced tomatoes
1/2 tsp. garam masala
Saute oil, onions, ginger, and garlic for 5 minutes. Place onion mixture & remaining ingredients except garam masala into crockpot and cook for 6-9 hours on low. Add garam masala before serving.
Saute oil, onions, ginger, and garlic for 5 minutes. Add remaining ingredients except garam masala and simmer covered for 30 minutes. Add garam masala before serving.
Recipe courtesy Simple Vegetarian Recipes

Chickpea Curry
2 Tbsp. olive oil
1 onion, diced
2 cloves garlic, minced
1 inch ginger, grated
1 tsp. cumin
1 tsp. coriander, crushed
1 tsp. turmeric
1 tsp. salt
15 oz. can chickpeas
15 oz. can diced tomatoes
1/2 tsp. garam masala
Saute oil, onions, ginger, and garlic for 5 minutes. Place onion mixture & remaining ingredients except garam masala into crockpot and cook for 6-9 hours on low. Add garam masala before serving.
Saute oil, onions, ginger, and garlic for 5 minutes. Add remaining ingredients except garam masala and simmer covered for 30 minutes. Add garam masala before serving.
Recipe courtesy Simple Vegetarian Recipes
Sunday, December 02, 2007
Cranberry Swirl Coffee Cake
I love cranberries! My freezer is stocked full of them. However, this recipe is great using canned whole berry cranberry sauce (though I'm sure it would be even better using homemade cranberry sauce). It's quick to put together, and the results are fabulous. It was perfect to serve for brunch on Thanksgiving Day. Just make sure to cool the cake before you try to glaze it. (Trust me; it works better that way.)
1/4 pound margarine (I used BlueBonnet)
1 cup sugar
2 eggs
1 teaspoon baking soda
2 cups all-purpose flour
1/2 teaspoon salt
1/2 pint (1 cup) sour cream
1 teaspoon almond or vanilla extract
7 or 8 ounce can whole cranberry sauce
1/2 cup chopped nuts, lightly toasted (I used pecans)
Glaze:
3/4 cup confectioners sugar
1/2 teaspoon almond or vanilla extract
1 tablespoon warm water
Preheat oven to 350F.
Grease 6 or 9 inch tube pan. Cream margarine and sugar with electric mixer. Add unbeaten eggs one at a time, beating after each addition on medium speed.
Mix dry ingredients and add alternating with sour cream.
Add flavoring. Put a layer of batter on bottom then swirl some cranberry sauce over batter and sprinkle with a few nuts. Add batter, more cranberry sauce, then the remaining batter and remaining cranberry sauce. Swirl the cranberry sauce into the batter with spatula or spoon. Sprinkle with nuts.
Bake for 55 minutes or until cake tests done with toothpick. Cool in pan for 5 minutes then turn out on rack to cool, or to serve. If desires, drizzle with glaze.
Glaze: Mix sugar, water and flavoring and drizzle over cooled or cold coffee cake.
Recipe courtesy Carroll Pellegrinelli on About.com
1/4 pound margarine (I used BlueBonnet)
1 cup sugar
2 eggs
1 teaspoon baking soda
2 cups all-purpose flour
1/2 teaspoon salt
1/2 pint (1 cup) sour cream
1 teaspoon almond or vanilla extract
7 or 8 ounce can whole cranberry sauce
1/2 cup chopped nuts, lightly toasted (I used pecans)
Glaze:
3/4 cup confectioners sugar
1/2 teaspoon almond or vanilla extract
1 tablespoon warm water
Preheat oven to 350F.
Grease 6 or 9 inch tube pan. Cream margarine and sugar with electric mixer. Add unbeaten eggs one at a time, beating after each addition on medium speed.
Mix dry ingredients and add alternating with sour cream.
Add flavoring. Put a layer of batter on bottom then swirl some cranberry sauce over batter and sprinkle with a few nuts. Add batter, more cranberry sauce, then the remaining batter and remaining cranberry sauce. Swirl the cranberry sauce into the batter with spatula or spoon. Sprinkle with nuts.
Bake for 55 minutes or until cake tests done with toothpick. Cool in pan for 5 minutes then turn out on rack to cool, or to serve. If desires, drizzle with glaze.
Glaze: Mix sugar, water and flavoring and drizzle over cooled or cold coffee cake.
Recipe courtesy Carroll Pellegrinelli on About.com
Thursday, November 29, 2007
Brined Turkey
This year is the first year I've cooked a turkey for Thanksgiving, and I decided to brine the turkey. Boy, am I glad I did! The turkey was so flavorful and juicy. My husband said it was probably the best turkey he'd ever had! Even my mother-in-law, who only likes dark meat, thought the white meat was really juicy. So, even if you never use this brining recipe, it's here so I have a record of what I did so I can repeat it next year. :)
2 gallons cold water
1 cup kosher salt
1 cup brown sugar
3 dried bay leaves
4 sprigs fresh thyme
2 sprigs fresh sage
1 Tbsp. dried lemon peel
1 Tbsp. dried orange peel
Heat ~1 quart of the water, salt, sugar, and bay leaves to and stir until the sugar and salt are dissolved. Use the remaining water to cool the mixture down. Place a washed turkey in the brine, making sure the cavity fills with the liquid. Put in the sprigs of thyme and sage. Put the dried citrus peel in a cotton bag or a pouch made of cheesecloth. Cover the turkey/brine and place in the refrigerator. Let sit for 8 hours, or overnight, up to 24 hours before cooking.
To cook: Remove the turkey from the brine, making sure the herbs stay with the brine instead of the turkey. Pat the turkey dry with paper towels. Put an onion, peeled & quartered, carrots and celery (use larger chunks) in the cavity along with some fresh sprigs of thyme and sage. Truss. Roast at 400F for an hour, covered with foil. Turn the heat down to 350 and cook for another 1.5 hours. Check the internal temp with a meat thermometer; it should read around 165. Take the turkey out and let it carry-over cook while covered in foil until it's done (about another hour). The outside won't be too pretty, but the meat is oh-so-tasty. *drool* :) I think next time, I'll roast it uncovered at first, then tent it with foil so the skin won't burn.
2 gallons cold water
1 cup kosher salt
1 cup brown sugar
3 dried bay leaves
4 sprigs fresh thyme
2 sprigs fresh sage
1 Tbsp. dried lemon peel
1 Tbsp. dried orange peel
Heat ~1 quart of the water, salt, sugar, and bay leaves to and stir until the sugar and salt are dissolved. Use the remaining water to cool the mixture down. Place a washed turkey in the brine, making sure the cavity fills with the liquid. Put in the sprigs of thyme and sage. Put the dried citrus peel in a cotton bag or a pouch made of cheesecloth. Cover the turkey/brine and place in the refrigerator. Let sit for 8 hours, or overnight, up to 24 hours before cooking.
To cook: Remove the turkey from the brine, making sure the herbs stay with the brine instead of the turkey. Pat the turkey dry with paper towels. Put an onion, peeled & quartered, carrots and celery (use larger chunks) in the cavity along with some fresh sprigs of thyme and sage. Truss. Roast at 400F for an hour, covered with foil. Turn the heat down to 350 and cook for another 1.5 hours. Check the internal temp with a meat thermometer; it should read around 165. Take the turkey out and let it carry-over cook while covered in foil until it's done (about another hour). The outside won't be too pretty, but the meat is oh-so-tasty. *drool* :) I think next time, I'll roast it uncovered at first, then tent it with foil so the skin won't burn.
Tuesday, November 27, 2007
Butternut Squash Apple Cranberry Bake
For a yummy fall side dish, this certainly fits the bill. In fact, I served it for Thanksgiving dinner this year. I found this recipe on Elise's Simply Recipes, but I've made a couple of minor changes to make it more delectable for my palate.
Butternut Squash Apple Cranberry Bake
1 large butternut squash, peeled and cut into 1-inch cubes
2 large tart cooking apples cut into 1/2-inch thick slices (no need to peel)
1/2 cup dried sweetened cranberries (i.e., Craisins), soaked in water or apple juice
1/2 cup brown sugar
1/4 cup (half a stick) butter
1 Tbsp flour
1 tsp salt
1/2 tsp ground nutmeg
Preheat oven to 350F.
Slice and peel squash and apples. Put squash cubes in ungreased 9x13-inch baking dish. Place apples on top and then cranberries. Mix the flour, salt, sugar, and nutmeg and sprinkle on top. Dot with butter. Bake 50-60 minutes.
Butternut Squash Apple Cranberry Bake
1 large butternut squash, peeled and cut into 1-inch cubes
2 large tart cooking apples cut into 1/2-inch thick slices (no need to peel)
1/2 cup dried sweetened cranberries (i.e., Craisins), soaked in water or apple juice
1/2 cup brown sugar
1/4 cup (half a stick) butter
1 Tbsp flour
1 tsp salt
1/2 tsp ground nutmeg
Preheat oven to 350F.
Slice and peel squash and apples. Put squash cubes in ungreased 9x13-inch baking dish. Place apples on top and then cranberries. Mix the flour, salt, sugar, and nutmeg and sprinkle on top. Dot with butter. Bake 50-60 minutes.
Wednesday, November 21, 2007
Corn Bread
I don't think there's anything I like better in the summer than homemade Corn Bread with butter and home-grown tomatoes. (My mouth is watering as I type!) However, for the Thanksgiving holiday, Corn Bread also makes a great stuffing/dressing to accompany the turkey. No matter when you eat it or how you make it, it's always yummy. This particular recipe is from my mother-in-law, with slight adaptations. I like a sweeter Corn Bread, but feel free to decrease the sugar to your own taste.
Corn Bread
1 cup flour
1 cup cornmeal (not self-rising!)
2 tsp. baking powder
1 tsp. salt
8 heaping tsp. sugar
2 eggs
1/4 cup oil
1 cup milk
Preheat oven to 425F. Mix dry ingredients in one bowl. In another bowl, mix the wet ingredients. Add the wet to the dry and mix just until combined. Let mixture sit for ~5 minutes while you preheat a cast iron skillet. Once the skillet is hot, add ~1 Tbsp. oil (enough to cover the bottom of the skillet with a thin layer). Pour the mixture into the skillet and bake for 15-20 minutes or until golden, brown, and delicious.
Corn Bread
1 cup flour
1 cup cornmeal (not self-rising!)
2 tsp. baking powder
1 tsp. salt
8 heaping tsp. sugar
2 eggs
1/4 cup oil
1 cup milk
Preheat oven to 425F. Mix dry ingredients in one bowl. In another bowl, mix the wet ingredients. Add the wet to the dry and mix just until combined. Let mixture sit for ~5 minutes while you preheat a cast iron skillet. Once the skillet is hot, add ~1 Tbsp. oil (enough to cover the bottom of the skillet with a thin layer). Pour the mixture into the skillet and bake for 15-20 minutes or until golden, brown, and delicious.
Sunday, November 04, 2007
Lone Oak Cookies (aka Cake Mix Cookies)

The organization with which we volunteer, Remote Area Medical (RAM), completed an expedition at Lone Oak Community Center this weekend. During most RAM expeditions, locals provide food for the volunteers, and the food at Lone Oak is always excellent. Several ladies from the community made homemade desserts for the weekend, and they were gracious enough to share two recipes with me. The first is Lone Oak Cookies (aka Cake Mix Cookies). I ate more than my share of these cookies over the last two days, and thanks to Joel (& Martha), I can make my own. :) The recipe, as given to me by Joel, is below. They're super easy and very tasty. Try orange cake mix...it's delicious!
Lone Oak Cookies
1 box cake mix
1/3 cup oil (she used corn oil)
2 eggs (she used large)
Canned/prepared icing - (she used vanilla)
Mix - this makes a very stiff dough. Make balls (smaller than a walnut). Bake 12 minutes at 350 degrees. Cool. Ice with canned icing between 2 cookies.
Monday, October 29, 2007
Greek Shrimp & Couscous
I've never been to Greece, so I'm not sure of the authenticity of this dish. However, I know it's tasty, easy, and quick to make from pantry & freezer staples, which is a good thing since I don't have a whole lot of time to cook these days. :) Enjoy!
Greek Shrimp & Couscous
1 (10-ounce) package couscous
2 teaspoons olive oil
1 pound frozen shrimp, thawed, peeled and de-veined
1 (14-ounce) can diced tomatoes with green pepper and onion, drained
1/2 cup Greek black olives, pitted and chopped
1 tablespoon dried mint leaves
1 teaspoon garlic and herb seasoning (i.e., Ms. Dash brand)
1 teaspoon dried oregano
Salt and freshly ground black pepper
In a medium saucepan, cook couscous according to package directions. (Or, for more flavor, use broth instead of water.)
In a separate pan/skillet, add olive oil and shrimp. Add tomatoes, olives, mint, garlic and herb seasoning, and oregano. Simmer for about 3 to 5 minutes to cook shrimp and heat through. Season, to taste, with salt and black pepper. Pour over couscous and serve.
Recipe courtesy Robin Miller/Food Network
Greek Shrimp & Couscous
1 (10-ounce) package couscous
2 teaspoons olive oil
1 pound frozen shrimp, thawed, peeled and de-veined
1 (14-ounce) can diced tomatoes with green pepper and onion, drained
1/2 cup Greek black olives, pitted and chopped
1 tablespoon dried mint leaves
1 teaspoon garlic and herb seasoning (i.e., Ms. Dash brand)
1 teaspoon dried oregano
Salt and freshly ground black pepper
In a medium saucepan, cook couscous according to package directions. (Or, for more flavor, use broth instead of water.)
In a separate pan/skillet, add olive oil and shrimp. Add tomatoes, olives, mint, garlic and herb seasoning, and oregano. Simmer for about 3 to 5 minutes to cook shrimp and heat through. Season, to taste, with salt and black pepper. Pour over couscous and serve.
Recipe courtesy Robin Miller/Food Network
Tuesday, October 23, 2007
While I was out...
I had this little fellow in September.

He arrived almost 2 weeks early, but he's perfectly fine. I had some complications during/after the birth, so I was out of commission for a few weeks, but I'll hopefully be back to posting soon. The only things I've made recently have been an Apple Cake and Banana Bread anyway, so you haven't missed much. :)
P.S. - Sorry for just a picture of an ear...at the moment I really don't want to post pictures of my child for the whole world to see. Might be the hormones...or maybe just orneryness. :) I might post pics here one day, but for now I'm keeping photos just for family.

He arrived almost 2 weeks early, but he's perfectly fine. I had some complications during/after the birth, so I was out of commission for a few weeks, but I'll hopefully be back to posting soon. The only things I've made recently have been an Apple Cake and Banana Bread anyway, so you haven't missed much. :)
P.S. - Sorry for just a picture of an ear...at the moment I really don't want to post pictures of my child for the whole world to see. Might be the hormones...or maybe just orneryness. :) I might post pics here one day, but for now I'm keeping photos just for family.
Saturday, August 18, 2007
Lemon Blueberry Trifle
My sister sent this recipe to me, and it's a great summertime dessert...nice and light but oh-so-delicious. Of course, it's better with homemade pound cake, but store-bought will work just fine. I omitted the white chocolate, but I'm sure it would be a tasty addition. And, if you don't have any lemon pudding on hand, you can do what I did and use vanilla pudding with some lemon extract. Worked like a charm.
Lemon Blueberry Trifle
1 1/2 c. milk
2 tbsp. lemon juice (the juice of one lemon)
16 oz. pound cake, cubed
8 oz. whipped topping
1 pint blueberries
8 oz. sour cream
2 4 serving pkgs. instant lemon pudding
1 lemon for garnish
1 oz. grated white chocolate (1 square), optional
Sprinkle lemon juice over cubed pound cake and set aside. Add sour cream and pudding to milk. Fold in 6 oz. of the whipped topping, reserving the rest for garnish. Stir until mixture starts to thicken. In trifle dish, layer as follows: Pound cake, blueberries, white chocolate, pudding mixture, until all is used. For top of trifle, pipe 10 rosettes of whipped topping around edge and top each rosette with a blueberry. Slice the lemon into thin slices and cut in half. Place the lemon slices between the rosettes. Any leftover white chocolate goes in the middle of the rosette circle on top of the trifle. Chill for 20 minutes to set and serve.
Lemon Blueberry Trifle
1 1/2 c. milk
2 tbsp. lemon juice (the juice of one lemon)
16 oz. pound cake, cubed
8 oz. whipped topping
1 pint blueberries
8 oz. sour cream
2 4 serving pkgs. instant lemon pudding
1 lemon for garnish
1 oz. grated white chocolate (1 square), optional
Sprinkle lemon juice over cubed pound cake and set aside. Add sour cream and pudding to milk. Fold in 6 oz. of the whipped topping, reserving the rest for garnish. Stir until mixture starts to thicken. In trifle dish, layer as follows: Pound cake, blueberries, white chocolate, pudding mixture, until all is used. For top of trifle, pipe 10 rosettes of whipped topping around edge and top each rosette with a blueberry. Slice the lemon into thin slices and cut in half. Place the lemon slices between the rosettes. Any leftover white chocolate goes in the middle of the rosette circle on top of the trifle. Chill for 20 minutes to set and serve.
Friday, August 17, 2007
More pics - non-food related
For those who are interested, here are the latest u/s pics. I'm at 34 weeks, so it won't be long now...


Thursday, August 16, 2007
Blogging By Mail!
I'm delinquent in posting about my Blogging By Mail package I received from Danielle of Habeas Brulee. She included several of her favorite ingredients as well some homemade goodies for me:
.JPG)
Let's see...we'll start from the bottom left. The small bag contains several vanilla beans, which I plan to use in either some creme brulee or creme caramel (in honor of Danielle's blog, Habeas Brulee). The larger zip-top bag contains homemade Hazelnut Amaretti Cookies. Yum! They're delicious and crunchy! (and I love hazelnuts!)
.JPG)
On top of the cookies are some new-to-me ingredients: Birdseye Chili Peppers and Urfa-Biber (Smoky Turkish Pepper). The aroma of each is intruiging, and I can't wait to try them! (I'm open to suggestions, too, if you're fond of these ingredients or have a recipe I should try; I don't have any idea yet as to how I'm going to use them.)
.JPG)
Continuing on, we have some Herbal Masala Chai, Mustard Oil, and Pomegranate Molasses. I could sit and sniff the bag of chai for hours...it smells absolutely wonderful! I'm looking forward to making some chai soon, but since it's been over 100 degrees here, it will have to be an iced chai. I hate to admit it, but I have no idea what to use the Mustard Oil for. I've never seen it before, so again, if you have suggestions, I'm open to them! The pomegranate molasses will definitely be incorporated into some of my recipes. I've been wanting to try some for quite a while, and now I finally can!
.JPG)
So, to Danielle, sorry for the delay in posting about the package. I'm excited to try some new things, and Thank You, Thank You for everything!
.JPG)
Let's see...we'll start from the bottom left. The small bag contains several vanilla beans, which I plan to use in either some creme brulee or creme caramel (in honor of Danielle's blog, Habeas Brulee). The larger zip-top bag contains homemade Hazelnut Amaretti Cookies. Yum! They're delicious and crunchy! (and I love hazelnuts!)
.JPG)
On top of the cookies are some new-to-me ingredients: Birdseye Chili Peppers and Urfa-Biber (Smoky Turkish Pepper). The aroma of each is intruiging, and I can't wait to try them! (I'm open to suggestions, too, if you're fond of these ingredients or have a recipe I should try; I don't have any idea yet as to how I'm going to use them.)
.JPG)
Continuing on, we have some Herbal Masala Chai, Mustard Oil, and Pomegranate Molasses. I could sit and sniff the bag of chai for hours...it smells absolutely wonderful! I'm looking forward to making some chai soon, but since it's been over 100 degrees here, it will have to be an iced chai. I hate to admit it, but I have no idea what to use the Mustard Oil for. I've never seen it before, so again, if you have suggestions, I'm open to them! The pomegranate molasses will definitely be incorporated into some of my recipes. I've been wanting to try some for quite a while, and now I finally can!
.JPG)
So, to Danielle, sorry for the delay in posting about the package. I'm excited to try some new things, and Thank You, Thank You for everything!
Wednesday, July 18, 2007
Animal, Vegetable, Miracle

I'm currently reading Animal, Vegetable, Miracle: A Year of Food Life by Barbara Kingsolver, with Steven L. Hopp and Camille Kingsolver. It's been quite an eye opener for me regarding the "food chain" (or, I guess it would be the food supply chain), especially in the U.S. I'm not sure how much it would apply to other countries, but ultimately the challenges (and problems) of feeding the world's population affect every country on the planet.
While I'm not finished reading the book, I would recommend it to you without hesitation. Her perspective, not to be discounted since she lives in a small, southern U.S. town, is refreshing and really made me think about the food I buy and eat in a different light.
Oh, and her daughter, Camille, contributes recipes and menus throughout the book. They are also available on the companion website (http://www.animalvegetablemiracle.com) for downloading. Be sure to check out both the book and the website.
Saturday, July 14, 2007
Apple Turnovers
I've purchased and baked the some-assembly-required turnovers available from the grocery store, and while they're tasty (they come in apple and cherry), they are a bit more 'processed' than I'd prefer. (Plus, I don't know exactly what's in them!) So, we now have an easy way to make tasty apple turnovers in our household that uses prepared puff pastry and homemade filling. I must give credit to my husband for perfecting the filling recipe. :) The filling can be made ahead of time (and I assume the turnovers can be assembled ahead of time, too, though I haven't tried it), so they're quick, easy, and tasty. Oh, and you can make the turnovers whatever size you'd like! They're great for breakfast or brunch with a good cup of coffee.
Apple Turnovers
1 sheet of Pepperidge Farm Puff Pastry (1/2 package), thawed
Filling:
1 large Granny Smith Apple, grated (peeling not necessary)
1 Tbsp. sugar (or to taste)
1 tsp. ground cinnamon (or to taste)
1/4 tsp. ground nutmeg (or to taste)
Preheat oven to 400F degrees. Mix filling ingredients and set aside. Cut the sheet of puff pastry into 6 squares (or 4 if you want bigger turnovers). Place the filling in the center of the square, fold into a triangle, and seal the edges with a fork. Bake for 10-15 minutes, until golden brown. Cool slightly. Dust with powedered sugar and serve.
Apple Turnovers
1 sheet of Pepperidge Farm Puff Pastry (1/2 package), thawed
Filling:
1 large Granny Smith Apple, grated (peeling not necessary)
1 Tbsp. sugar (or to taste)
1 tsp. ground cinnamon (or to taste)
1/4 tsp. ground nutmeg (or to taste)
Preheat oven to 400F degrees. Mix filling ingredients and set aside. Cut the sheet of puff pastry into 6 squares (or 4 if you want bigger turnovers). Place the filling in the center of the square, fold into a triangle, and seal the edges with a fork. Bake for 10-15 minutes, until golden brown. Cool slightly. Dust with powedered sugar and serve.
Friday, June 29, 2007
Food Find
I haven't been doing much experimenting lately with new recipes (mainly because I'm still unpacking our house), but I have visited a few foodie-type stores in the area to see what's available. One such store is the European Market, a small shop that stocks hundreds of items imported from various countries in Europe, from meats to noodles, juices to chocolates, etc. I had read about Lingonberries on Anne's blog, so when I saw a jar of Lingonberry Jam (imported from Sweden), I had to try some. I am so glad I did! It's delicious! The jam has a delicious taste similar to cranberries, but the sweet-tart balance is absolutely perfect for my tastebuds. If you have a local market that carries products from Europe, see if they carry Lingonberry Jam. Or, do a search online for some. Amazon.com carries it. You'll be glad you did.
Friday, June 15, 2007
Moving Right Along...
Since I last posted, we've packed up our house and moved to a different city. I've still got LOTS of unpacking to do, but I've been back in our 'old' town this week for work while my husband paints our new house. (pregnancy + paint fumes = not good). So, needless to say, I've not been cooking/baking much lately. However, I'm still collecting recipes to try, and I hope to post some yummy recipes soon!
Oh, and don't forget to sign up for Blogging By Mail, hosted by Stephanie from Dispensing Happiness. You'll love it!
Meanwhile, here's the latest ultrasound picture. We're not finding out if it's a boy or girl until he/she arrives. My due date is September 25.
.jpg)
Oh, and don't forget to sign up for Blogging By Mail, hosted by Stephanie from Dispensing Happiness. You'll love it!
Meanwhile, here's the latest ultrasound picture. We're not finding out if it's a boy or girl until he/she arrives. My due date is September 25.
.jpg)
Tuesday, May 29, 2007
Strawberry Trifle

I realized the perfect way to not waste a cake that falls in the middle is to use it in a trifle! Just trim off the edges and/or any part that isn't done, cube it, and add some macerated fruit and whipped cream. It's delicious! I made this trifle during graduation weekend when we had 19 people at our house to help us celebrate, and it was a big hit. For once, I didn't use a recipe, but I'll explain what I did.
I used leftover Strawberry Cake that I had intended to use as a birthday cake for a friend's daughter. Since the middle fell (it was pitifully embarrasing...it looked awful), I trimmed the edges, cubed it, and froze it until I needed it. I thawed and macerated some strawberries (just spooned sugar over them and let them sit in the fridge overnight) and layered cake, fruit, and whipped cream in a glass bowl with straight sides. (After all, the presentation is really pretty, too!) I topped the whipped cream with a few blueberries, and voila! Easy, tasty dessert with rave reviews.
Rice Krispies Treats
I was feeling somewhat nostalgic this weekend (while craving something sweet), so I decided to make some Rice Krispies Treats. I haven't had them in years, but they brought back many pleasant memories, mostly of my mom, my sister, and me making them on Friday nights while watching tv. Isn't it amazing how certain smells and foods can bring back memories so strongly? Anyway, while the recipe certainly isn't new, it's a classic. Make some with your kids/grandkids/spouse/significant other, and enjoy.
Kellogg's Rice Krispies Treats (Original)
3 Tbsp. butter (or margarine)
10 oz. (about 40) regular marshmallows OR 4 cups miniature marshmallows (or 7 oz. marshmallow creme or fluff)
6 cups Rice Krispies
Melt margarine in large saucepan over low heat. Add marshmallows and stir until completely melted. Remove from heat. Add KELLOGG'S RICE KRISPIES cereal. Stir until well coated.
Using buttered spatula or waxed paper, press mixture evenly into 13 x 9 x 2-inch pan coated with cooking spray. Cut into 2-inch squares when cool. Best if served the same day.
Yield: 24 squares
Recipe courtesy Kellogg's
Kellogg's Rice Krispies Treats (Original)
3 Tbsp. butter (or margarine)
10 oz. (about 40) regular marshmallows OR 4 cups miniature marshmallows (or 7 oz. marshmallow creme or fluff)
6 cups Rice Krispies
Melt margarine in large saucepan over low heat. Add marshmallows and stir until completely melted. Remove from heat. Add KELLOGG'S RICE KRISPIES cereal. Stir until well coated.
Using buttered spatula or waxed paper, press mixture evenly into 13 x 9 x 2-inch pan coated with cooking spray. Cut into 2-inch squares when cool. Best if served the same day.
Yield: 24 squares
Recipe courtesy Kellogg's
Tuesday, May 15, 2007
Sausage Balls
I love sausage balls, not only because they can be prepared ahead of time, but also because they're simple to make and tasty. This is another recipe that brings me back to my childhood as my mom made these frequently for receptions and parties. These didn't turn out as well as hers, though the ingredients were the same. Perhaps I made them too small so they dried out. I need to tweak this a bit (perhaps using less Bisquick), but they're still good. And, they're even better if you let them sit (no need for refrigeration) for a day or so before eating them.
Sausage Balls
3 cups Bisquick
2 cups shredded cheddar cheese
1 lb. sausage (I prefer hot, otherwise they can be somewhat bland)
Preheat the oven to 350 F.
Mix all ingredients in a large bowl until well combined. (I do this with my hands and it takes a few minutes to get everything consistently mixed.) Roll into 1-inch balls, place on a baking sheet, and bake 15 minutes or until golden brown. Cool and serve.
Sausage Balls
3 cups Bisquick
2 cups shredded cheddar cheese
1 lb. sausage (I prefer hot, otherwise they can be somewhat bland)
Preheat the oven to 350 F.
Mix all ingredients in a large bowl until well combined. (I do this with my hands and it takes a few minutes to get everything consistently mixed.) Roll into 1-inch balls, place on a baking sheet, and bake 15 minutes or until golden brown. Cool and serve.
Tuesday, May 08, 2007
Feeding a Multitude
At least, we had enough food this weekend to do just that. My husband graduated from medical school, and we had plenty of family on hand to help us celebrate. Last week was filled with cooking and baking preparations so we'd be able to avoid going out to restaurants and dealing with all of those logistics. It was enough to try to get everyone transported to and from the graduation events! But, we had a wonderful time, and it was great to see some family that (a) we hadn't seen in a while, (b) we have never met, and (c) could help me out in the kitchen! :) I made Indiana Garden Salad, Chinese Noodle Salad, Banana Bread, Sausage Balls, KFC Clone Coleslaw, and lots of other yummy stuff. I'll post the recipe for the sausage balls later this week (they're super easy and get better the longer they sit). For now, here's the recipe for the KFC Clone Coleslaw. I can't remember the website from where I retrieved it, but we thought it was pretty close to the Colonel's. I think I would add a bit more pepper, but that's it.
KFC Coleslaw Clone Recipe
8 1/2 cups chopped cabbage
1/3 cup shredded carrot
1 tsp. onion, chopped fine
Dressing:
3/4 cup buttermilk (can substitute 1 tsp. white vinegar + 3/4 cup regular milk)
1/2 cup mayonnaise
1/8 cup milk
2 Tbsp. lemon juice
1/2 tsp. salt
1/8 tsp. pepper
1/3 cup granulated sugar
Mix cabbage, carrot, and onion. Whisk together all dressing ingredients except salt, pepper, & sugar and mix well. Add the salt and pepper; stir. Add the sugar and whisk until well-mixed. Pour dressing over cabbage and carrots and refrigerate overnight.
KFC Coleslaw Clone Recipe
8 1/2 cups chopped cabbage
1/3 cup shredded carrot
1 tsp. onion, chopped fine
Dressing:
3/4 cup buttermilk (can substitute 1 tsp. white vinegar + 3/4 cup regular milk)
1/2 cup mayonnaise
1/8 cup milk
2 Tbsp. lemon juice
1/2 tsp. salt
1/8 tsp. pepper
1/3 cup granulated sugar
Mix cabbage, carrot, and onion. Whisk together all dressing ingredients except salt, pepper, & sugar and mix well. Add the salt and pepper; stir. Add the sugar and whisk until well-mixed. Pour dressing over cabbage and carrots and refrigerate overnight.
Monday, April 09, 2007
Still Here
Wow...I didn't realize it's been nearly a month since I last posted! I guess life just became too busy in the past weeks. I have been doing a little baking, but nothing has turned out to be spectacular. Actually, I'm just glad I can stand to be in the kitchen again. For a while there I didn't want to be near the smell of food cooking (at least not long enough for me to cook or bake something). Why, do you ask?

So, that's why I haven't been cooking and baking as much. However, my nausea is getting better, and my kitchen endeavors should pick up the pace again soon.
Also, we found out in mid-March that we'll be moving in a few months, so I've been busy packing up things, preparing for a yard/garage sale, and readying the house to put it on the market. Busy, busy!
All this is to say, "Hang in there..." I haven't dropped completely off the face of the earth, and I should be back to my regularly-posting self soon.

So, that's why I haven't been cooking and baking as much. However, my nausea is getting better, and my kitchen endeavors should pick up the pace again soon.
Also, we found out in mid-March that we'll be moving in a few months, so I've been busy packing up things, preparing for a yard/garage sale, and readying the house to put it on the market. Busy, busy!
All this is to say, "Hang in there..." I haven't dropped completely off the face of the earth, and I should be back to my regularly-posting self soon.
Tuesday, March 06, 2007
Chess Bars
I finally did some baking this weekend, and I made this recipe twice! It's one of my favorites, but my mom had to convince me to try them when I was growing up...I thought they had coconut in them (and I've never liked coconut). I'm glad she convinced me! They're both delicious and addictive. (Consider yourself warned.) At least you don't have to worry about dirtying your stand mixer for this recipe. I even use the same bowl to mix the crust and filling. Less mess to clean makes this recipe even sweeter.
Preheat oven to 325F.
For the crust:
1 box yellow cake mix
1 egg
1 stick (8 Tbsp/4 oz) butter, softened
Mix above ingredients with hand mixer until all of the cake mix is moistened. Spray a long sheet pan (at least 12" x 18") with non-stick spray. Press cake mix into the bottom of the pan, covering all of the surface with a thin layer.
For the Filling/Topping:
1 1lb box of confectioners sugar (10X)
8 oz. cream cheese, softened
2 eggs
1 tsp. vanilla
Mix ingredients together with hand mixer until well blended. Pour this over the crust.
Bake for 35-40 minutes, or until the filling is golden brown on top. Cool, cut, and serve.
Preheat oven to 325F.
For the crust:
1 box yellow cake mix
1 egg
1 stick (8 Tbsp/4 oz) butter, softened
Mix above ingredients with hand mixer until all of the cake mix is moistened. Spray a long sheet pan (at least 12" x 18") with non-stick spray. Press cake mix into the bottom of the pan, covering all of the surface with a thin layer.
For the Filling/Topping:
1 1lb box of confectioners sugar (10X)
8 oz. cream cheese, softened
2 eggs
1 tsp. vanilla
Mix ingredients together with hand mixer until well blended. Pour this over the crust.
Bake for 35-40 minutes, or until the filling is golden brown on top. Cool, cut, and serve.
Friday, February 16, 2007
Pickled Beets
My mom used to make these (actually, she still does), and I absolutely love them. They're great plain, or in a salad, or for whatever else you want to use them for! Pickled beets are so simple to make - please, don't buy them pre-made! However, you can start with canned beets in whatever shape you like (whole, sliced, cubed, chunked, etc). If they're big chunks or slices, I prefer them cold; if however, they're cubed, I like them hot.
This recipe easily doubles...triples...multiplies however many times you want to make it.
2 cans beets, drained - reserve the juice (I used whole beets & cut them into chunks)
1 cup sugar
1 cup white vinegar
1 cup beet juice (from canned beets)
Combine sugar, vinegar, and beet juice and bring to a boil over medium heat. After it reaches a full boil, remove from the heat, cool slightly, and pour over the beets. You'll probably have some juice left over, but not enough for a third can of beets. (This works best if you put them into a canning jar & use a wide-mouth funnel.) Two cans of beets (not sliced) will fill up a quart jar. Either keep them in the fridge, or process them according to home-canning directions.
This recipe easily doubles...triples...multiplies however many times you want to make it.
2 cans beets, drained - reserve the juice (I used whole beets & cut them into chunks)
1 cup sugar
1 cup white vinegar
1 cup beet juice (from canned beets)
Combine sugar, vinegar, and beet juice and bring to a boil over medium heat. After it reaches a full boil, remove from the heat, cool slightly, and pour over the beets. You'll probably have some juice left over, but not enough for a third can of beets. (This works best if you put them into a canning jar & use a wide-mouth funnel.) Two cans of beets (not sliced) will fill up a quart jar. Either keep them in the fridge, or process them according to home-canning directions.
Tuesday, February 13, 2007
Long Time, No See
My apologies to anyone who's been checking this site for new recipes; I've been sick, and the last thing on my mind was the computer and my blog! No cooking/baking for me lately - I've just been munching on peanut butter & bananas on Saltine crackers with a glass of milk. However, I'm doing much better, and hopefully I'll be able to start cooking/baking again soon. I received some samples from another Pam's Pantry (she's in Michigan), so, again, hopefully I'll be posting my thoughts on some of her mixes soon.
Meanwhile, Happy Valentine's Day! Make some Pink Stuff to share with your sweetheart(s)!
Meanwhile, Happy Valentine's Day! Make some Pink Stuff to share with your sweetheart(s)!
Thursday, January 25, 2007
Apple Pound Cake
Hey folks. I haven't been cooking/baking much lately, hence, the lack of posting. However, I thought I'd share another recipe from my grandmother. She made this for Christmas, and, if I'd skipped Christmas lunch, I'd have consumed the entire cake by myself. It's that good. Obviously I'm biased, but this cake is scrumptious, and the almost crunchy exterior provides a nice contrast to the chewy interior. Yum.
1 1/2 c. oil
2 c. sugar
3 eggs
2 tsp. vanilla
3 c. all-purpose flour
1 tsp. baking soda
1 tsp. salt
1/2 tsp. cinnamon
1/2 tsp. grated nutmeg
2 c. finely chopped peeled apples
1 c. chopped nuts
1/2 c. golden raisins
Apple Cider Glaze (recipe follows)
Preheat oven to 325F.
Beat oil, sugar, eggs, and vanilla until well blended. Combine dry ingredients and add to the sugar mixture, beating well. Spoon into a greased and floured 10-inch tube pan (she used a square tube pan). Bake for about 1 hour or until the cake tests done. Let it cool 10 minutes before removing from the pan. Prick the top with a fork and drizzle on the glaze.
Apple Cider Glaze
1/2 c. apple juice
1.2 c. brown sugar
1/4 stick butter (2 Tbsp.)
Boil the ingredients together until the sugar is dissolved. (She also notes that you could add 1/3 c. Apple Jack if desired, but she doesn't add it.)
1 1/2 c. oil
2 c. sugar
3 eggs
2 tsp. vanilla
3 c. all-purpose flour
1 tsp. baking soda
1 tsp. salt
1/2 tsp. cinnamon
1/2 tsp. grated nutmeg
2 c. finely chopped peeled apples
1 c. chopped nuts
1/2 c. golden raisins
Apple Cider Glaze (recipe follows)
Preheat oven to 325F.
Beat oil, sugar, eggs, and vanilla until well blended. Combine dry ingredients and add to the sugar mixture, beating well. Spoon into a greased and floured 10-inch tube pan (she used a square tube pan). Bake for about 1 hour or until the cake tests done. Let it cool 10 minutes before removing from the pan. Prick the top with a fork and drizzle on the glaze.
Apple Cider Glaze
1/2 c. apple juice
1.2 c. brown sugar
1/4 stick butter (2 Tbsp.)
Boil the ingredients together until the sugar is dissolved. (She also notes that you could add 1/3 c. Apple Jack if desired, but she doesn't add it.)
Thursday, January 18, 2007
Blueberry Maple Breakfast Bake
I found this recipe on Simply Recipes a while back, and I finally got the chance to try it. I had to adjust it slightly since I didn't have a 9x9 pan. I thought it was rather tasty (and leftovers make a good quick breakfast before dashing off to work), especially when drizzled with more maple syrup. Elise presents great recipes and photos (almost daily!), so be sure to check out her blog: Simply Recipes.
Blueberry Maple Breakfast Bake (slightly adapted)
3/4 loaf of white bread (I used Sara Lee White Wheat)
4 oz reduced-fat cream cheese
2 cups fresh or frozen blueberries, divided
6 eggs, beaten
1 cups milk
1/4 cup maple syrup
1/4 cup melted butter
Preheat oven to 350 degrees F.
Remove crusts from bread; cut into one inch cubes. Cut cream cheese in small cubes (makes about 1 cup). Grease a 8x8x2 inch baking dish. Place half of the bread cubes in the dish. Scatter cream cheese cubes and 1 cup of blueberries over the bread. Top with remaining bread cubes and blueberries. In a bowl, combine eggs, milk, maple syrup and butter. Carefully pour over bread mixture. Bake until a knife inserted in the center comes out clean, about 1 hour, covering with aluminum foil if eges brown too much. To serve, cut into squares. Accompany with additional maple syrup, if desired. Can be prepared the night before, and just baked before serving.
Blueberry Maple Breakfast Bake (slightly adapted)
3/4 loaf of white bread (I used Sara Lee White Wheat)
4 oz reduced-fat cream cheese
2 cups fresh or frozen blueberries, divided
6 eggs, beaten
1 cups milk
1/4 cup maple syrup
1/4 cup melted butter
Preheat oven to 350 degrees F.
Remove crusts from bread; cut into one inch cubes. Cut cream cheese in small cubes (makes about 1 cup). Grease a 8x8x2 inch baking dish. Place half of the bread cubes in the dish. Scatter cream cheese cubes and 1 cup of blueberries over the bread. Top with remaining bread cubes and blueberries. In a bowl, combine eggs, milk, maple syrup and butter. Carefully pour over bread mixture. Bake until a knife inserted in the center comes out clean, about 1 hour, covering with aluminum foil if eges brown too much. To serve, cut into squares. Accompany with additional maple syrup, if desired. Can be prepared the night before, and just baked before serving.
Friday, January 12, 2007
Chateau Morrisette
Chateau Morrisette is one of Virginia's largest wineries, and it is located just off the Blue Ridge Parkway (Milepost 171.5). My husband and I stopped at the winery on our honeymoon. When we go to visit my family, we pass within 5 miles of this hidden gem. For those who know me well, the last thing you'd expect me to support would be a winery. However, don't worry! I'm not here to promote their wine. I'm here to recommend that everyone try their vinegars!


Thursday, January 11, 2007
Blogging By Mail
I finally received my BBM package in the mail yesterday! Aarika from Aarikavination enclosed a letter explaining her rather extensive run of back luck before/during the holidays. Things finally calmed down enough for her to get my package in the mail this week. Hopefully things will calm down even more for Aarika soon!
But, you're interested in the package contents, aren't you? Well, tada! All sorts of goodies!

Starting from the top left, moving clockwise: Double Apple Muffin Mix, from Aarika's local farmer's market; Milk N Honees (Milk Honey Filled Drops); Honey Pear Tea; Raspberry Ginger Tea. Next is a a mix CD entitled "Calmness: December Megamix"; after her eventful holiday season, I'm sure she could use a little calmness in her life! The CD is resting on a big bag of (homemade) White Chocolate Peppermint Pretzel Sticks. She said the JELLO Cheesecake Pudding intrigued her when she saw it in the grocery store, and I'm glad she sent it. It's really good with some frozen fruit when you're in a hurry to make a tasty dessert. In front are an Amish Country Postcard and an "Aspens" postcard by Ansel Adams - Excellent choice! I love Ansel Adams' work, and "Aspens" is one of my favorite scenes from his collection. Finally, we have candy canes, (in the middle) Candy Cane Hershey Kisses, and the cute tea towel everything is resting on! Since I don't like milk or dark chocolate, she definitely gave me a reason to smile with all the white chocolate. The Candy Cane Kisses are really yummy; it's hard not to eat the whole bag at once!
 I can hardly wait to try the muffin mix; this Saturday morning's breakfast will be the perfect opportunity to do so. The Milk N Honees are wonderful! They remind me of a candy I used to eat when I was growing up. (Wow, was that really 18 years ago?!) I haven't tasted the tea yet, but it certainly smells great. I'll have to have some with my Double Apple Muffins!

Isn't this cute?! Aarika lamented about the tea towel being slightly out of season, but I don't mind a bit. And, like she said, we can all use another tea towel, right? I know I certainly can.

Here's one more cute item from the package, though it was on the outside. Aarika decorated the outside of the package with festive stickers, and I thought these guys were just adorable.
Thank you so much, Aarika, for the package! And, thanks also to Stephanie of Dispensing Happiness for heading up this BBM effort!
But, you're interested in the package contents, aren't you? Well, tada! All sorts of goodies!

Starting from the top left, moving clockwise: Double Apple Muffin Mix, from Aarika's local farmer's market; Milk N Honees (Milk Honey Filled Drops); Honey Pear Tea; Raspberry Ginger Tea. Next is a a mix CD entitled "Calmness: December Megamix"; after her eventful holiday season, I'm sure she could use a little calmness in her life! The CD is resting on a big bag of (homemade) White Chocolate Peppermint Pretzel Sticks. She said the JELLO Cheesecake Pudding intrigued her when she saw it in the grocery store, and I'm glad she sent it. It's really good with some frozen fruit when you're in a hurry to make a tasty dessert. In front are an Amish Country Postcard and an "Aspens" postcard by Ansel Adams - Excellent choice! I love Ansel Adams' work, and "Aspens" is one of my favorite scenes from his collection. Finally, we have candy canes, (in the middle) Candy Cane Hershey Kisses, and the cute tea towel everything is resting on! Since I don't like milk or dark chocolate, she definitely gave me a reason to smile with all the white chocolate. The Candy Cane Kisses are really yummy; it's hard not to eat the whole bag at once!
 I can hardly wait to try the muffin mix; this Saturday morning's breakfast will be the perfect opportunity to do so. The Milk N Honees are wonderful! They remind me of a candy I used to eat when I was growing up. (Wow, was that really 18 years ago?!) I haven't tasted the tea yet, but it certainly smells great. I'll have to have some with my Double Apple Muffins!
Isn't this cute?! Aarika lamented about the tea towel being slightly out of season, but I don't mind a bit. And, like she said, we can all use another tea towel, right? I know I certainly can.

Here's one more cute item from the package, though it was on the outside. Aarika decorated the outside of the package with festive stickers, and I thought these guys were just adorable.
Thank you so much, Aarika, for the package! And, thanks also to Stephanie of Dispensing Happiness for heading up this BBM effort!
Wednesday, January 10, 2007
Comments
I was beginnning to wonder why no one had commented on any of my posts. And, I knew people were visiting this blog. So, what gives? My stupidity, of course. I had comment moderation enabled, but I didn't know there were any comments to moderate. So, I apologize (especially to Brilynn from Jumbo Empanadas). The few comments that have been left are now visible.
Tuesday, January 09, 2007
Apple Cabbage Raisin Salad
I'm glad to be back from a rather long hiatus! (I tried to update earlier, but Blogger decided that I didn't need to update my blog.) I hope you had a great holiday with your family and friends. Ours was busy, but it was great to see everyone again.
While I was gone, my BBM partner finally received her package from me. [Again, I'm sorry for the delay, but at least you received it before Christmas!] Lisa from La Mia Cucina posted about the package here. I'm so glad that she really liked all the goodies I sent; it's so much fun to gather everything and wait to see/read the recipient's reaction! No word yet on the BBM package I'm supposed to receive; hopefully my BBM partner isn't having too much bad luck these days...especially over the holidays.
Speaking of holidays, I'll share a recipe from my grandmother that she prepared for Christmas lunch: Apple Cabbage Raisin Salad. I haven't actually made it yet, but it's scrumptious. Trust me. I'm sure you could substitute low-fat yogurt for the mayo, but I'd drain it really well to get the right consistency before adding it to the other ingredients. This recipe serves 4, but it can easily be doubled as needed. I'd recommend preparing this dish the day before you'll serve it.
1 red apple, chopped (do not peel)
2 cups shredded cabbage
1/2 cup raisins
1/2 cup sliced almonds
1/3 cup light mayonnaise (or more if needed - just add to taste)
Toss the chopped apples together with the cabbage, raisins, and almonds in a bowl. Stir in mayo and mix well. Store in the refrigerator; serve chilled.
While I was gone, my BBM partner finally received her package from me. [Again, I'm sorry for the delay, but at least you received it before Christmas!] Lisa from La Mia Cucina posted about the package here. I'm so glad that she really liked all the goodies I sent; it's so much fun to gather everything and wait to see/read the recipient's reaction! No word yet on the BBM package I'm supposed to receive; hopefully my BBM partner isn't having too much bad luck these days...especially over the holidays.
Speaking of holidays, I'll share a recipe from my grandmother that she prepared for Christmas lunch: Apple Cabbage Raisin Salad. I haven't actually made it yet, but it's scrumptious. Trust me. I'm sure you could substitute low-fat yogurt for the mayo, but I'd drain it really well to get the right consistency before adding it to the other ingredients. This recipe serves 4, but it can easily be doubled as needed. I'd recommend preparing this dish the day before you'll serve it.
1 red apple, chopped (do not peel)
2 cups shredded cabbage
1/2 cup raisins
1/2 cup sliced almonds
1/3 cup light mayonnaise (or more if needed - just add to taste)
Toss the chopped apples together with the cabbage, raisins, and almonds in a bowl. Stir in mayo and mix well. Store in the refrigerator; serve chilled.
Wednesday, December 20, 2006
Peanut Butter and Chocolate Bundt Cake
In celebration of some friends' anniversary, I made this cake while babysitting for them at their house. So far, they don't seem to mind being guinea pigs for my baking adventures. They have reported that this cake was good, so I'll take their word for it. (I trust their tastebuds!) I added some chocolate ganache to the cake, which made for a rather nice presentation.
This recipe hails from Culinary in theDesert Country, which he adapted from Canadian Living. It seems to be quite a keeper. I forgot my camera, so no pictures to share yet; however, Joe has a good photo on his blog so you can see what it looks like.
For the filling:
2/3 cup peanut butter
1/3 cup cream cheese, softened
1 tablespoon butter, softened
3 egg yolks
1 teaspoon vanilla
1/3 cup granulated sugar
2 tablespoons all-purpose flour
For the cake batter:
1 3/4 cups all-purpose flour
1/2 teaspoons baking soda
1/2 teaspoons salt
12 tablespoons natural cocoa powder
3/4 cup boiling water
3 ounces quality bittersweet chocolate, chopped
12 tablespoons sour cream
12 tablespoons butter, softened
1 2/3 cups packed brown sugar
2 eggs
2 teaspoons vanilla
Preheat oven to 350F.
To make the filling:
In a large mixing bowl, beat peanut butter, cream cheese and butter until combined. Add egg yolks, one at a time, and beat until combined. Mix in vanilla. Be sure to scrape down the sides. Pour in sugar and flour, mix until combined. Fit a pastry bag with a large plain tip and scoop the filling into the bag. (I didn't use a tip on the pastry bag, and it worked just fine.) Place in the refrigerator until ready to use.
To make the batter:
In a medium bowl, whisk together flour, baking soda and salt.
In a medium metal or glass bowl, add cocoa and whisk in boiling water. Add in chopped chocolate and whisk until smooth. Mix in sour cream.
In large mixing bowl, cream together butter and sugar until light and fluffy. Mix in eggs, one at a time, and then beat in vanilla. Alternatively mix in the dry ingredients and the cocoa mixture, beginning and ending with the flour. Mix just until combined with each addition.
Spray a bundt pan with a nonstick spray that has flour included (like Baker's Joy or Pam with Flour). Spoon a little less than half of the batter into bottom of the bundt pan. Using the pastry bag that has the peanut butter mixture, carefully pipe a ring of the filling over the center of the chocolate batter. Pour the remaining batter on top and gently tap the pan to remove air bubbles.
Bake until top springs back when lightly touched or a toothpick comes out mostly clean with a few crumbs attached - about 50-60 minutes. Remove from the oven and set on a wire rack to cool for 5 minutes. Place a wire cooling rack on top of the cake and carefully turn over - remove the pan and let cool completely.
This recipe hails from Culinary in the
For the filling:
2/3 cup peanut butter
1/3 cup cream cheese, softened
1 tablespoon butter, softened
3 egg yolks
1 teaspoon vanilla
1/3 cup granulated sugar
2 tablespoons all-purpose flour
For the cake batter:
1 3/4 cups all-purpose flour
1/2 teaspoons baking soda
1/2 teaspoons salt
12 tablespoons natural cocoa powder
3/4 cup boiling water
3 ounces quality bittersweet chocolate, chopped
12 tablespoons sour cream
12 tablespoons butter, softened
1 2/3 cups packed brown sugar
2 eggs
2 teaspoons vanilla
Preheat oven to 350F.
To make the filling:
In a large mixing bowl, beat peanut butter, cream cheese and butter until combined. Add egg yolks, one at a time, and beat until combined. Mix in vanilla. Be sure to scrape down the sides. Pour in sugar and flour, mix until combined. Fit a pastry bag with a large plain tip and scoop the filling into the bag. (I didn't use a tip on the pastry bag, and it worked just fine.) Place in the refrigerator until ready to use.
To make the batter:
In a medium bowl, whisk together flour, baking soda and salt.
In a medium metal or glass bowl, add cocoa and whisk in boiling water. Add in chopped chocolate and whisk until smooth. Mix in sour cream.
In large mixing bowl, cream together butter and sugar until light and fluffy. Mix in eggs, one at a time, and then beat in vanilla. Alternatively mix in the dry ingredients and the cocoa mixture, beginning and ending with the flour. Mix just until combined with each addition.
Spray a bundt pan with a nonstick spray that has flour included (like Baker's Joy or Pam with Flour). Spoon a little less than half of the batter into bottom of the bundt pan. Using the pastry bag that has the peanut butter mixture, carefully pipe a ring of the filling over the center of the chocolate batter. Pour the remaining batter on top and gently tap the pan to remove air bubbles.
Bake until top springs back when lightly touched or a toothpick comes out mostly clean with a few crumbs attached - about 50-60 minutes. Remove from the oven and set on a wire rack to cool for 5 minutes. Place a wire cooling rack on top of the cake and carefully turn over - remove the pan and let cool completely.
Friday, December 15, 2006
Chocolate Espresso Snowcaps
I said previously that the holidays make me feel all "Martha Stewarty"; to prove my point, here's one of the goodies I'm giving as gifts this year. And, yes, it's a Martha recipe (slightly adapted). It's pretty simple and easy to double (or triple) the recipe, but it's also somewhat time consuming since you have to roll them out & in sugar twice. These cookies received my husband's nod of approval, so they pass the "share-able" test. Plus, I think they look neat, too. *One warning: your hands will get very chocolatey.
1/2 cup all-purpose flour
1/4 cup unsweetened cocoa powder
4 teaspoons instant coffee (or espresso powder)
1 teaspoon baking powder
1/8 teaspoon salt
4 tablespoons unsalted butter, room temperature
2/3 cup packed light-brown sugar
1 large egg
4 ounces bittersweet or semisweet chocolate, melted and cooled (I used semisweet chocolate chips)
1 tablespoon milk
confectioners sugar, for coating
Preheat oven to 350F and prepare baking sheets with parchment or a Silpat. (Do this while your hands are still clean!)
In a medium bowl, whisk together flour, cocoa, coffee (or espresso), baking powder, and salt. In a stand mixer (the dough will fairly stiff), beat butter and brown sugar until light and fluffy. Beat in egg until well combined; mix in cooled chocolate. With mixer on low speed, gradually add dry ingredients; beat in milk just until combined. Flatten dough into a disk; wrap in plastic. Freeze until firm, about 45 minutes.
Place confectioners’ sugar into a medium bowl; working in batches, roll balls in sugar twice. Place balls on prepared baking sheets, 2 inches apart. Bake, rotating sheets halfway through, until cookies have spread and coating is cracked, 12 to 14 minutes; cookies will still be soft to the touch. Transfer to a wire rack to cool completely.
1/2 cup all-purpose flour
1/4 cup unsweetened cocoa powder
4 teaspoons instant coffee (or espresso powder)
1 teaspoon baking powder
1/8 teaspoon salt
4 tablespoons unsalted butter, room temperature
2/3 cup packed light-brown sugar
1 large egg
4 ounces bittersweet or semisweet chocolate, melted and cooled (I used semisweet chocolate chips)
1 tablespoon milk
confectioners sugar, for coating
Preheat oven to 350F and prepare baking sheets with parchment or a Silpat. (Do this while your hands are still clean!)
In a medium bowl, whisk together flour, cocoa, coffee (or espresso), baking powder, and salt. In a stand mixer (the dough will fairly stiff), beat butter and brown sugar until light and fluffy. Beat in egg until well combined; mix in cooled chocolate. With mixer on low speed, gradually add dry ingredients; beat in milk just until combined. Flatten dough into a disk; wrap in plastic. Freeze until firm, about 45 minutes.
Place confectioners’ sugar into a medium bowl; working in batches, roll balls in sugar twice. Place balls on prepared baking sheets, 2 inches apart. Bake, rotating sheets halfway through, until cookies have spread and coating is cracked, 12 to 14 minutes; cookies will still be soft to the touch. Transfer to a wire rack to cool completely.
I'm Back!
My apologies to those who kept checking this blog over the past week to find no updates whatsoever. I wasn't trying to be a slacker; on the contrary, I've been a very, very busy girl. I completed my final 3 courses and will graduate tomorrow (finally!) with dual graduate degrees. Oh, and I've been trying to get up my Christmas decorations, clean the house, and, yes, do some baking. Okay, I've been doing lots of baking, so much that I didn't stop to take pictures. (We're talking non-stop, all day long yesterday!) So, I'm back, at least for a week. I'll be out of town during Christmas, but I'll try to post some of the recipes of the goodies I'm giving as Christmas gifts. In case I don't get back here before Dec. 25, I'll wish you a Merry Christmas! I hope you celebrate with lots of family, friends, and good food!
Wednesday, November 29, 2006
Semi-Sabbatical
Since I have 5 major projects to complete before Dec. 12 (not including all the holiday stuff I have to do), I will likely not be posting until the 12th.
Then, it's an all-out baking frenzy.
Oh, and now that I have my Blogging By Mail swap partner, I have to get my BBM package ready, too.
I love this time of year. Makes me feel all Martha-Stewarty. :)
Then, it's an all-out baking frenzy.
Oh, and now that I have my Blogging By Mail swap partner, I have to get my BBM package ready, too.
I love this time of year. Makes me feel all Martha-Stewarty. :)
Monday, November 20, 2006
Vanilla Caramel Popcorn
Since popcorn is one of my favorite snacks, and I like trying out new recipes, this weekend included a rendezvous with my oven to make this recipe from bakingsheet. Serendipitously, I, too, had a measuring mishap during the process, though mine was due to misreading rather than being startled. I used 2 Tablespoons instead of 2 teaspoons of molasses. (I scooped some out and added a bit of corn syrup back to get the ratio somewhat correct.) I also added some nuts to the mix. We found the extra molasses and nuts to be wonderful. I would have had a picture to share, but unfortunately, the popcorn was devoured too quickly. So, without further adieu, here's my modified version of Vanilla Caramel Popcorn.
8-10 cups popcorn, un- or lightly-salted (I used air popped)
1 cup almonds, chopped (medium pieces, about 1/4 inch)
1 cup light brown sugar
1/2 cup light corn syrup
4 tsp molasses (original recipe calls for 2 tsp)
1 Tbsp. butter
1/2 tsp salt
1/2 tsp baking soda
1 Tbsp. vanilla
Pop the corn and let cool. Line a 10x15 pan with lightly greased foil or a Silpat. Preheat oven to 250F. Place glass bowl in oven to warm while making the caramel.
In a medium saucepan, combine sugar, corn syrup, molasses and butter; bring to a boil over medium heat. Cook until the mixture reaches 250F and is at hard-ball stage (use a candy thermometer). This will take 2 to 3 minutes.
In the meantime, transfer popcorn and nuts to the now-warm glass bowl.
Remove pan from the heat and immediately stir in salt, baking soda, and vanilla. (Warning, the mixture will foam!) Pour the mixture over the popcorn and nuts, stirring until most of the kernels are coated. Pour mixture onto baking sheet.
Bake for 1 hour, stirring (and if necessary, spreading out) every 15-20 minutes.
Let cool and break into pieces. Store in an airtight container.
8-10 cups popcorn, un- or lightly-salted (I used air popped)
1 cup almonds, chopped (medium pieces, about 1/4 inch)
1 cup light brown sugar
1/2 cup light corn syrup
4 tsp molasses (original recipe calls for 2 tsp)
1 Tbsp. butter
1/2 tsp salt
1/2 tsp baking soda
1 Tbsp. vanilla
Pop the corn and let cool. Line a 10x15 pan with lightly greased foil or a Silpat. Preheat oven to 250F. Place glass bowl in oven to warm while making the caramel.
In a medium saucepan, combine sugar, corn syrup, molasses and butter; bring to a boil over medium heat. Cook until the mixture reaches 250F and is at hard-ball stage (use a candy thermometer). This will take 2 to 3 minutes.
In the meantime, transfer popcorn and nuts to the now-warm glass bowl.
Remove pan from the heat and immediately stir in salt, baking soda, and vanilla. (Warning, the mixture will foam!) Pour the mixture over the popcorn and nuts, stirring until most of the kernels are coated. Pour mixture onto baking sheet.
Bake for 1 hour, stirring (and if necessary, spreading out) every 15-20 minutes.
Let cool and break into pieces. Store in an airtight container.
Thursday, November 16, 2006
Chocolate Buttermilk Scones with Raspberry Filling
This recipe hails from a former public tv personality, Father Dominic, of Breaking Bread. We saw the episode with these scones, and my husband had to try them. In short, he thought they were fabulous. Personally, I'd use seedless preserves, but if you like the seeds, by all means, go ahead and use regular preserves. Or use strawberry preserves. Either way, these will taste wonderful.
2 cups all purpose flour
1/4 cup unsweetened cocoa powder
1/2 cup granulated sugar
1 Tbsp. baking powder
1/8 tsp. baking soda
1/4 tsp. salt
1/2 cup (1 stick) butter, cold, cut into small pieces
1/3 cup milk chocolate morsels, chopped fine
1/2 cup buttermilk
1 egg, beaten
1/2 cup raspberry preserves
Preheat the oven to 400F.
Sift flour, cocoa powder, sugar, baking powder, baking soda, and salt into a large bowl; stir to mix well. Using a pastry blender or two knives, cut butter into flour mixture until mixture resembles coarse crumbs. Stir in finely chopped chocolate. Combine buttermilk and egg in a small bowl; whisk until well blended. Pour into flour mixture; stir with a wooden spoon until just moistened. Do not overmix.
Turn out dough onto a lightly floured surface ; knead gently 8 or 10 strokes. Divide dough in half. On a lightly floured surface, pat each piece into a flattened 8-inch round. Place one round on a lightly greased baking sheet or jelly-roll pan. Spread preserves on top of the round. Place the second round on top of the preserves. Using a large knife or metal spatula, cut into 8 wedges, wiping the knife after each cut.
Bake 15-20 minutes, or until firm on the edges but still slightly soft in the middle. Let cool on a wire rack, then cut wedges apart before serving.
2 cups all purpose flour
1/4 cup unsweetened cocoa powder
1/2 cup granulated sugar
1 Tbsp. baking powder
1/8 tsp. baking soda
1/4 tsp. salt
1/2 cup (1 stick) butter, cold, cut into small pieces
1/3 cup milk chocolate morsels, chopped fine
1/2 cup buttermilk
1 egg, beaten
1/2 cup raspberry preserves
Preheat the oven to 400F.
Sift flour, cocoa powder, sugar, baking powder, baking soda, and salt into a large bowl; stir to mix well. Using a pastry blender or two knives, cut butter into flour mixture until mixture resembles coarse crumbs. Stir in finely chopped chocolate. Combine buttermilk and egg in a small bowl; whisk until well blended. Pour into flour mixture; stir with a wooden spoon until just moistened. Do not overmix.
Turn out dough onto a lightly floured surface ; knead gently 8 or 10 strokes. Divide dough in half. On a lightly floured surface, pat each piece into a flattened 8-inch round. Place one round on a lightly greased baking sheet or jelly-roll pan. Spread preserves on top of the round. Place the second round on top of the preserves. Using a large knife or metal spatula, cut into 8 wedges, wiping the knife after each cut.
Bake 15-20 minutes, or until firm on the edges but still slightly soft in the middle. Let cool on a wire rack, then cut wedges apart before serving.
Tuesday, November 14, 2006
Vermicelli Pudding
I saw this Indian-inspired recipe on The Saturday Early Show's Chef on a Shoestring (CBS) quite a while ago. This dessert is not overly sweet, but it does have an interesting texture combination of the pasta and nuts. I preferred it warm, but it can be eaten warm, room temperature, or cold. If you reheat it (if there's any left), just add a little milk or cream.
1 Tbsp. ghee or butter
3 Tbsp. mixed nuts, chopped (I just used cashews)
1 1/4 to 1 1/2 cups (5 oz) vermicelli, broken into short lengths
1 1/4 cups milk
2/3 cup canned evaporated milk
5 Tbsp. white sugar
Heat the ghee or butter in a heavy saucepan and fry 2 tablespoons of the nuts for a few minutes, until golden brown. Add the vermicelli and fry until it begins to turn golden, taking care not to over-brown it. Add both the milks and the sugar. Bring to a boil and reduce the heat, scraping down the sides of the pan to return the creamy
residue into the milk. Simmer for 12-15 minutes until the vermicelli is soft. Remove from the heat and pour into individual serving bowls. Sprinkle with the mixed nuts. Allow to cool thoroughly then chill in the refrigerator if serving cold, or you can serve it warm.
1 Tbsp. ghee or butter
3 Tbsp. mixed nuts, chopped (I just used cashews)
1 1/4 to 1 1/2 cups (5 oz) vermicelli, broken into short lengths
1 1/4 cups milk
2/3 cup canned evaporated milk
5 Tbsp. white sugar
Heat the ghee or butter in a heavy saucepan and fry 2 tablespoons of the nuts for a few minutes, until golden brown. Add the vermicelli and fry until it begins to turn golden, taking care not to over-brown it. Add both the milks and the sugar. Bring to a boil and reduce the heat, scraping down the sides of the pan to return the creamy
residue into the milk. Simmer for 12-15 minutes until the vermicelli is soft. Remove from the heat and pour into individual serving bowls. Sprinkle with the mixed nuts. Allow to cool thoroughly then chill in the refrigerator if serving cold, or you can serve it warm.
Thursday, November 09, 2006
Okra Pancakes
This is another Martha recipe. While some might not be a big fan of okra, I (and most of my family) really like it. I would bet that you could use frozen okra for this recipe, but be sure to slice it thinly (no bigger than 1/4 inch thick rounds) and use the non-breaded kind. Also, I didn't have any peanut oil, but olive oil worked well for me. These are an excellent side dish, especially in the summer when they are in season.
1/2 cup stone-ground white cornmeal
1/2 cup all-purpose flour
1 1/2 tsp. coarse salt, plus more for serving
1 tsp. baking powder
1 large egg, lightly beaten
1/2 cup water
1/2 tsp. freshly ground pepper
1/2 tsp. coarse salt
1/2 cup finely chopped onion (~1 small onion)
2 cups thinly sliced okra (~ 1 pound)
Peanut (or olive) oil for frying
In a medium bowl, combine the cornmeal, flour, 1 1/2 teaspoons salt, and the baking powder. Whisk to combine. In a second bowl, whisk together the egg and water. Stir the egg mixture into the dry ingredients. It should resemble the texture of loose mashed potatoes; if not, add a little more water.
In a small bowl, combine the onion and okra. Season with remaining salt and pepper. Toss to combine, and fold into the batter.
In a cast-iron skillet, heat 1/2 to 1 inch of oil to 340F. Working in batches so as not to crowd the pan, spoon the batter by heaping teaspoons into the hot oil. Fry until golden brown, 1 to 2 minutes per side. Use a slotted spoon to remove from oil. Drain on a wire rack or crumpled paper towels. Sprinkle with salt, and serve immediately.
1/2 cup stone-ground white cornmeal
1/2 cup all-purpose flour
1 1/2 tsp. coarse salt, plus more for serving
1 tsp. baking powder
1 large egg, lightly beaten
1/2 cup water
1/2 tsp. freshly ground pepper
1/2 tsp. coarse salt
1/2 cup finely chopped onion (~1 small onion)
2 cups thinly sliced okra (~ 1 pound)
Peanut (or olive) oil for frying
In a medium bowl, combine the cornmeal, flour, 1 1/2 teaspoons salt, and the baking powder. Whisk to combine. In a second bowl, whisk together the egg and water. Stir the egg mixture into the dry ingredients. It should resemble the texture of loose mashed potatoes; if not, add a little more water.
In a small bowl, combine the onion and okra. Season with remaining salt and pepper. Toss to combine, and fold into the batter.
In a cast-iron skillet, heat 1/2 to 1 inch of oil to 340F. Working in batches so as not to crowd the pan, spoon the batter by heaping teaspoons into the hot oil. Fry until golden brown, 1 to 2 minutes per side. Use a slotted spoon to remove from oil. Drain on a wire rack or crumpled paper towels. Sprinkle with salt, and serve immediately.
Tuesday, November 07, 2006
Blogging By Mail is back!
If you're interested, head on over to Dispensing Happiness and see the details. Then, email Stephanie with your info and have fun! I thoroughly enjoyed the last round of BBM, and I'm greatly looking forward to this one, too! So, what are you waiting for? Sign up now!

Thursday, November 02, 2006
Sugar Cookies
These simple cookies are great plain, decorated with icing or sugar, or used in the Ravioli Cookies.
1 cup butter
1 cup sugar
1 large egg
2 tsp. baking powder
1 tsp. vanilla
2 3/4 cups flour
Preheat oven to 400F. In a large bowl, cream butter and sugar with an electric mixer. Beat in egg and vanilla. Add baking powder and flour, one cup at a time, mixing after each addition. The dough will by very stiff; blend last flour in by hand. Do not chill dough. Note: THe dough can be tinted with Icing Color. Add small amounts until desired color is reached. For chocolate cookies: Stir in 3 ounces melted, unsweetened chocolate (if dough becomes too stiff, add water, a teaspoon at a time).
Roll out dough into 1/8 inch thick. (You may need to divide the dough into 2 balls first.) Use desired cookie cutters to cut shapes from rolled dough. Place cookies onto parchment or Silpat lined baking sheets. Bake on the top rack of the oven for 6-7 minutes or until lightly browned. Serve plain or decorated as desired.
1 cup butter
1 cup sugar
1 large egg
2 tsp. baking powder
1 tsp. vanilla
2 3/4 cups flour
Preheat oven to 400F. In a large bowl, cream butter and sugar with an electric mixer. Beat in egg and vanilla. Add baking powder and flour, one cup at a time, mixing after each addition. The dough will by very stiff; blend last flour in by hand. Do not chill dough. Note: THe dough can be tinted with Icing Color. Add small amounts until desired color is reached. For chocolate cookies: Stir in 3 ounces melted, unsweetened chocolate (if dough becomes too stiff, add water, a teaspoon at a time).
Roll out dough into 1/8 inch thick. (You may need to divide the dough into 2 balls first.) Use desired cookie cutters to cut shapes from rolled dough. Place cookies onto parchment or Silpat lined baking sheets. Bake on the top rack of the oven for 6-7 minutes or until lightly browned. Serve plain or decorated as desired.
Tuesday, October 31, 2006
Checkerboard Cookies
I first saw these cookies on Martha Stewart's website and became intrigued. I thought they looked like a lot of trouble and stashed the idea in the back of my mind. I volunteered to make cookies for the Fall Festival at my church and decided to give these a try. Yes, indeed, they are a bit of trouble. I think if you were making several batches at once, it would be much more efficient. However, the results were rather visually appealing (though perhaps not as perfect as Martha's). I didn't have Dutch process cocoa powder, so the flavor was a bit off (according to my husband). However, I think the kids will enjoy them nonetheless.
1 cup (2 sticks) unsalted butter, softened
1/2 cup sugar
1 teaspoon vanilla extract
1/4 teaspoon lemon extract
1/4 teaspoon salt
2 1/2 cups sifted all-purpose flour
3 tablespoons Dutch-process cocoa powder
1 large egg
In the bowl of an electric mixer fitted with the paddle attachment, cream butter and sugar until well blended, 1 to 2 minutes. Add vanilla extract, lemon extract, and salt. With mixer on low speed, gradually add flour, scraping down sides of bowl.
Turn dough out onto a clean work surface; it will be loose and crumbly. Knead dough by pushing small amounts away from you with the heel of your hand for 1 to 2 minutes. Divide dough in half. Sprinkle cocoa powder over one of the halves. Knead until cocoa has been fully incorporated. (This step can be avoided if making two batches; just add cocoa to one batch and leave the other plain.)
Place each half of the kneaded dough between two sheets of plastic. Using a rolling pin, shape dough into two 7-inch squares, about 3/8 inch thick. Using a sharp knife and a ruler, slice each square into nine 3/4-inch-wide strips.
Whisk together the egg and 1 tablespoon water. Cover work surface with plastic wrap. Place three strips of dough on plastic, alternating white and chocolate strips. Brush tops and in between the strips with egg wash. Gently press strips together. Repeat, forming second and third layers, alternating colors to create a checkerboard effect. Wrap assembled log in plastic. Repeat process for second log, reversing color pattern. Refrigerate 30 minutes, or freeze 15 minutes.
Preheat oven to 350F; line a baking sheet with a silicone baking mat or parchment paper. Slice each log into 1/4-inch-thick slices; place on baking sheet. Bake until done, 10 to 12 minutes. Remove baking sheet from oven, and let cookies cool 2 minutes. Transfer cookies to a wire rack to cool completely.
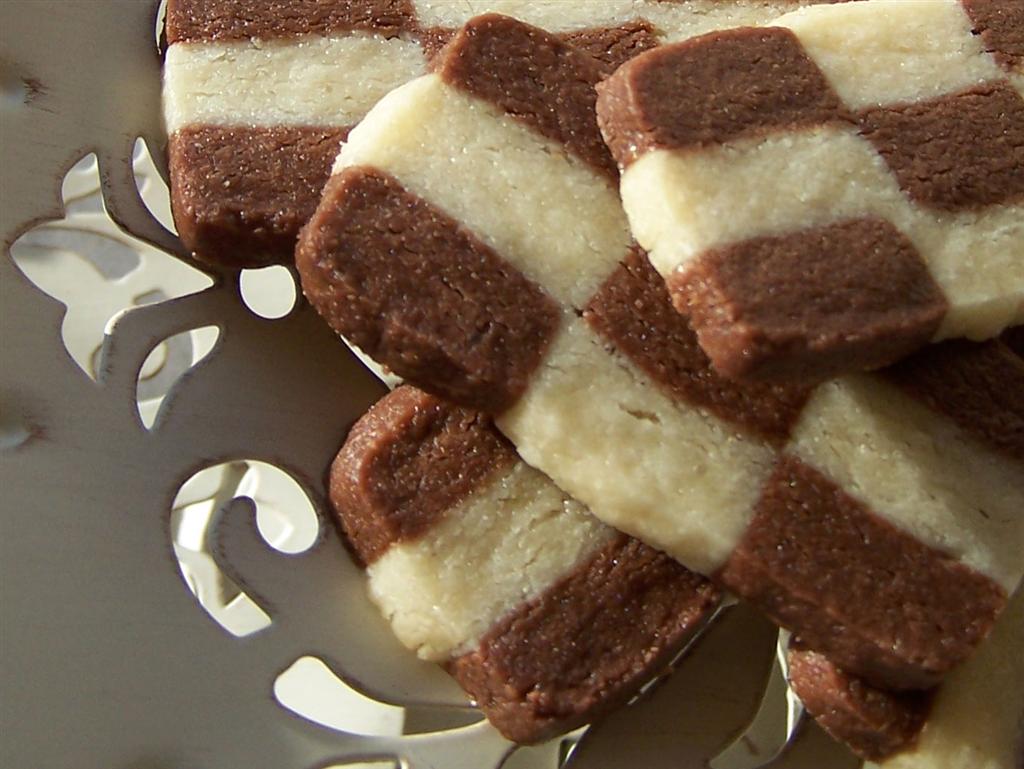
1 cup (2 sticks) unsalted butter, softened
1/2 cup sugar
1 teaspoon vanilla extract
1/4 teaspoon lemon extract
1/4 teaspoon salt
2 1/2 cups sifted all-purpose flour
3 tablespoons Dutch-process cocoa powder
1 large egg
In the bowl of an electric mixer fitted with the paddle attachment, cream butter and sugar until well blended, 1 to 2 minutes. Add vanilla extract, lemon extract, and salt. With mixer on low speed, gradually add flour, scraping down sides of bowl.
Turn dough out onto a clean work surface; it will be loose and crumbly. Knead dough by pushing small amounts away from you with the heel of your hand for 1 to 2 minutes. Divide dough in half. Sprinkle cocoa powder over one of the halves. Knead until cocoa has been fully incorporated. (This step can be avoided if making two batches; just add cocoa to one batch and leave the other plain.)
Place each half of the kneaded dough between two sheets of plastic. Using a rolling pin, shape dough into two 7-inch squares, about 3/8 inch thick. Using a sharp knife and a ruler, slice each square into nine 3/4-inch-wide strips.
Whisk together the egg and 1 tablespoon water. Cover work surface with plastic wrap. Place three strips of dough on plastic, alternating white and chocolate strips. Brush tops and in between the strips with egg wash. Gently press strips together. Repeat, forming second and third layers, alternating colors to create a checkerboard effect. Wrap assembled log in plastic. Repeat process for second log, reversing color pattern. Refrigerate 30 minutes, or freeze 15 minutes.
Preheat oven to 350F; line a baking sheet with a silicone baking mat or parchment paper. Slice each log into 1/4-inch-thick slices; place on baking sheet. Bake until done, 10 to 12 minutes. Remove baking sheet from oven, and let cookies cool 2 minutes. Transfer cookies to a wire rack to cool completely.
Tuesday, October 24, 2006
Thursday, October 19, 2006
Buttercream Icing
Great for decorating cakes, this recipe is straight from Wilton.
1/2 cup solid vegetable shortening
1/2 cup butter or margarine*
1 teaspoon Clear Vanilla
4 cups sifted confectioners' sugar (approx. 1 lb.)
2 tablespoons milk**
Cream butter and shortening with electric mixer. Add vanilla. Gradually add sugar, one cup at a time, beating well on medium speed. Scrape sides and bottom of bowl often. When all sugar has been mixed in, icing will appear dry. Add milk and beat at medium speed until light and fluffy. Keep icing covered with a damp cloth until ready to use. For best results, keep icing bowl in refrigerator when not in use. Refrigerated in an airtight container, this icing can be stored 2 weeks. Rewhip before using.
YIELD: 3 cups
*Substitute all-vegetable shortening and 1/2 teaspoon Wilton No-Color Butter Flavor for pure white icing and stiffer consistency.
**Add 2 tablespoons light corn syrup per recipe to thin for icing cake.
1/2 cup solid vegetable shortening
1/2 cup butter or margarine*
1 teaspoon Clear Vanilla
4 cups sifted confectioners' sugar (approx. 1 lb.)
2 tablespoons milk**
Cream butter and shortening with electric mixer. Add vanilla. Gradually add sugar, one cup at a time, beating well on medium speed. Scrape sides and bottom of bowl often. When all sugar has been mixed in, icing will appear dry. Add milk and beat at medium speed until light and fluffy. Keep icing covered with a damp cloth until ready to use. For best results, keep icing bowl in refrigerator when not in use. Refrigerated in an airtight container, this icing can be stored 2 weeks. Rewhip before using.
YIELD: 3 cups
*Substitute all-vegetable shortening and 1/2 teaspoon Wilton No-Color Butter Flavor for pure white icing and stiffer consistency.
**Add 2 tablespoons light corn syrup per recipe to thin for icing cake.
Tuesday, October 17, 2006
Wedding Cake
Sorry, no recipe today. Instead, I thought I'd share some photos of the wedding cake I made for some friends. The cake is Carrot Cake with Buttercream Icing. There were two and a half 11x15 inch sheetcakes (2 layers) in addition to these cakes, too.


The wedding was beautiful...congratulations Mr. & Mrs. Smith!
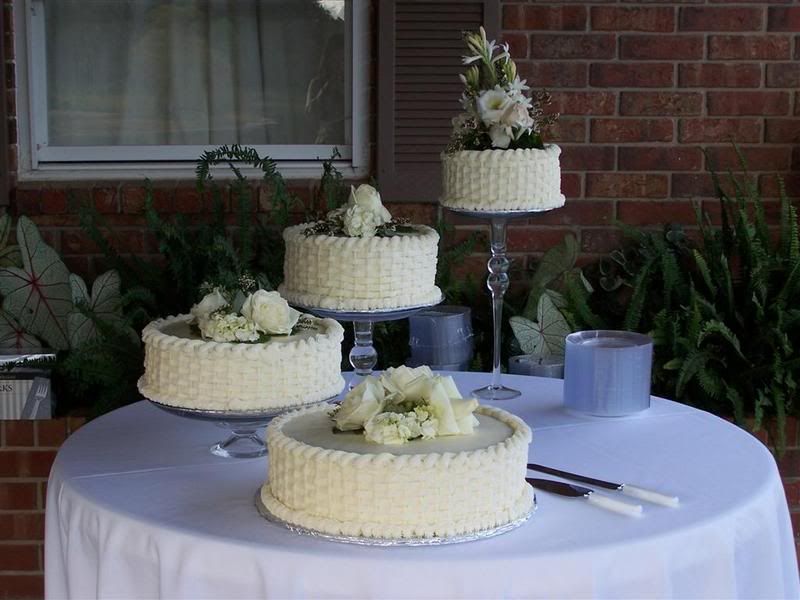
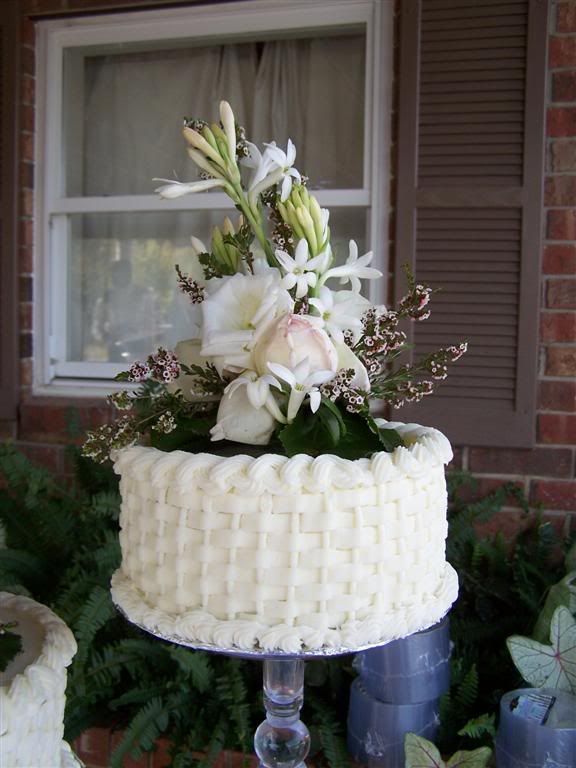
The wedding was beautiful...congratulations Mr. & Mrs. Smith!
Thursday, October 12, 2006
Ravioli Cookies
It's a silly name, I know, but they received rave reviews from coworkers. And, they're easily customizable to suit any taste. Since I don't like chocolate, I haven't actually tried one of these cookies, but I am planning to try these with white chocolate. I'll post how they turn out.
Basic Sugar Cookie Dough
Rolling Pin
Waxed or Parchment paper
Pizza Cutter
Hershey's Miniatures
Unwrap the Hershey's Miniatures and break each bar in half.
Roll out the sugar cookie dough between sheets of waxed or parchment paper to 1/8 inch thick. Use the pizza cutter to cut 2-inch squares. Place one half of a chocolate in the middle of every other square. Carefully flip the adjacent square onto the chocolate and press the dough down around it, removing air bubbles. (Air bubbles are bad and can cause the sides to "blow out", similar to normal ravioli.) Seal the edges with the tines of a fork. Transfer cookies to a parchment-lined baking sheet (or use a silicone-lined baking sheet). Bake at 325F for 15-20 minutes, or until golden. Remove immediately to a cooling rack. Serve with milk. :)
Basic Sugar Cookie Dough
Rolling Pin
Waxed or Parchment paper
Pizza Cutter
Hershey's Miniatures
Unwrap the Hershey's Miniatures and break each bar in half.
Roll out the sugar cookie dough between sheets of waxed or parchment paper to 1/8 inch thick. Use the pizza cutter to cut 2-inch squares. Place one half of a chocolate in the middle of every other square. Carefully flip the adjacent square onto the chocolate and press the dough down around it, removing air bubbles. (Air bubbles are bad and can cause the sides to "blow out", similar to normal ravioli.) Seal the edges with the tines of a fork. Transfer cookies to a parchment-lined baking sheet (or use a silicone-lined baking sheet). Bake at 325F for 15-20 minutes, or until golden. Remove immediately to a cooling rack. Serve with milk. :)
Tuesday, October 10, 2006
Chickpea Crisps
I first saw this recipe on Martha Stewart. She called them "Paprika Chickpeas," but I felt that title was rather bland for such a recipe. They remind me of Corn Nuts, though MUCH better and not nearly as salty. I used the pimenton I received from Bri via Blogging By Mail, and it lends a nice, smokey flavor to this snack. I haven't yet tried it with other spices, but I'm sure a cajun or curry flavor would be delicious as well. *Update: Anne has already tried other spices with excellent results.* They're addictive, so you may want to double the recipe; just be sure to use 2 pans.
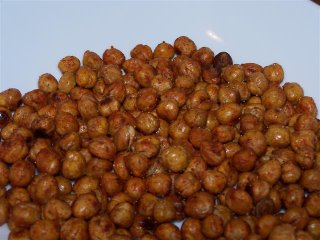
2 cans (~15 oz each) chickpeas (garbanzo beans)
3 Tbsp. olive oil (I used 2 and it was plenty)
1 1/2 tsp. coarse salt (or 1 tsp. table salt)
1 tsp. pimenton (smoked paprika)
Preheat the oveb to 400F. Drain the chickpeas and dry thoroughly. Put into a bowl (plastic bags work well, too) and coat the beans with olive oil. Spread onto a baking sheet (1 layer) and bake for 30-40 minutes or until golden brown, tossing every 5-7 minutes. Remove the pan and sprinkle with salt and spice; shake to coat. (I put them into a bowl - it's easier to coat them evenly.) Bake another 2-3 minutes. Cool on a paper towel lined plate and enjoy!

2 cans (~15 oz each) chickpeas (garbanzo beans)
3 Tbsp. olive oil (I used 2 and it was plenty)
1 1/2 tsp. coarse salt (or 1 tsp. table salt)
1 tsp. pimenton (smoked paprika)
Preheat the oveb to 400F. Drain the chickpeas and dry thoroughly. Put into a bowl (plastic bags work well, too) and coat the beans with olive oil. Spread onto a baking sheet (1 layer) and bake for 30-40 minutes or until golden brown, tossing every 5-7 minutes. Remove the pan and sprinkle with salt and spice; shake to coat. (I put them into a bowl - it's easier to coat them evenly.) Bake another 2-3 minutes. Cool on a paper towel lined plate and enjoy!
Thursday, October 05, 2006
Caramels
1/2 cup butter
2 cups firmly packed brown sugar
1 cup light corn syrup
Dash salt
1 (14-ounce) can sweetened condensed milk
1 teaspoon vanilla
Melt butter in 2-quart saucepan; add brown sugar, corn syrup and salt. Cook over medium
heat, stirring occasionally, until mixture comes to a full boil (10 to 12 minutes). Stir in sweetened condensed milk. Continue cooking, stirring occasionally, until small amount of mixture dropped into ice water forms a firm ball or candy thermometer reaches 250°F (25 to 30 minutes). Remove from heat; stir in vanilla. Pour into prepared dish. Let cool completely. Remove from dish using parchment, and cut into sqares.
Recipe adapted from Land O' Lakes.
2 cups firmly packed brown sugar
1 cup light corn syrup
Dash salt
1 (14-ounce) can sweetened condensed milk
1 teaspoon vanilla
Melt butter in 2-quart saucepan; add brown sugar, corn syrup and salt. Cook over medium
heat, stirring occasionally, until mixture comes to a full boil (10 to 12 minutes). Stir in sweetened condensed milk. Continue cooking, stirring occasionally, until small amount of mixture dropped into ice water forms a firm ball or candy thermometer reaches 250°F (25 to 30 minutes). Remove from heat; stir in vanilla. Pour into prepared dish. Let cool completely. Remove from dish using parchment, and cut into sqares.
Recipe adapted from Land O' Lakes.
Tuesday, October 03, 2006
Fruit Roll Cookies (Low Sugar)
1 cup margarine, softened
8 oz regular or reduced fat cream cheese, softened
3 cups all-purpose flour
1/2 tsp. salt
1 Tbsp. sugar
10 oz all-fruit preserves (no sugar added)
In a large mixing bowl, combined margarine and cream cheese; beat until well blended. Gradually add flour, sugar, and salt. Mix well. On a lightly floured surface, shape into a ball or log; cover with plastic wrap and chill for an hour for easier handling.
Preheat oven to 350F. Divide dough into 3 equal parts. On floured surface, roll each section of dough into a rectangle approximately 8x14 inches. Spread ~1/3 of the preserves on the dough. Roll up jelly roll style, beginning with one of the longer sides. Using a sharp knife, slice into half inch slices. Bake, flat side down, on a parchment lined cookie sheet about 1/2 inch apart, for 25-30 minutes or until lightly golden.
8 oz regular or reduced fat cream cheese, softened
3 cups all-purpose flour
1/2 tsp. salt
1 Tbsp. sugar
10 oz all-fruit preserves (no sugar added)
In a large mixing bowl, combined margarine and cream cheese; beat until well blended. Gradually add flour, sugar, and salt. Mix well. On a lightly floured surface, shape into a ball or log; cover with plastic wrap and chill for an hour for easier handling.
Preheat oven to 350F. Divide dough into 3 equal parts. On floured surface, roll each section of dough into a rectangle approximately 8x14 inches. Spread ~1/3 of the preserves on the dough. Roll up jelly roll style, beginning with one of the longer sides. Using a sharp knife, slice into half inch slices. Bake, flat side down, on a parchment lined cookie sheet about 1/2 inch apart, for 25-30 minutes or until lightly golden.
Thursday, September 28, 2006
Sour Cream Coffee Cake
This is delicious in the spring or fall. It is the perfect accompaniment to crisp mornings that require a good cup of hot tea or coffee.
2 Tbsp. sugar
3/4 cup chopped walnuts
1 1/2 tsp. ground cinnamon
2 1/2 cups cake flour
2 cups sugar
2 tsp. baking powder
1/2 tsp. baking soda
1/2 tsp. salt
12 Tbsp. (1 1/2 sticks) chilled, unsalted butter, cut into small pieces
3 large eggs, lightly beaten
1 1/4 cups sour cream
1 1/2 tsp. vanilla extract
3 Tbsp. milk (optional)
1 1/2 cups confectioner's sugar (10X) (optional)
1 cup fresh raspberries or other fruit (optional)
Preheat oven to 350F. Butter & flour a Bundt or rosette pan.
Cream butter until smooth and gradually add 2 cups of sugar on medium speed until light and smooth, scraping down the sides of the bowl occasionally. (5-6 minutes) Add the eggs gradually and continue beating until the mixture is thick, fluffy, and doubles in volume. (4-5 minutes) Beat in sour cream and vanilla (2 minutes more).
In a separate bowl, combine 2 Tbsp. sugar, walnuts, and cinnamon. In another bowl, combine flour, baking powder, baking soda, and salt; sift the mixture twice. Carefully fold in the flour mixture with the butter mixture (half at a time) until smooth. Pour half of the batter into the prepared pan and spread to the edges. Sprinkle the cinnamon-walnut mixture evenly over the batter. Spread the remaining batter over the top, making the sides higher than the center.
Bake in the center of the oven until the top is set and springs back when touched and the cake pulls away slightly from the pan. (55-60 minutes) Let the cake cool for 1 hour. Unmold cake onto serving plate.
For Glaze: Whisk milk and confectioner's sugar until smooth. Garnish cake with fruit and drizzle glaze over cake.
2 Tbsp. sugar
3/4 cup chopped walnuts
1 1/2 tsp. ground cinnamon
2 1/2 cups cake flour
2 cups sugar
2 tsp. baking powder
1/2 tsp. baking soda
1/2 tsp. salt
12 Tbsp. (1 1/2 sticks) chilled, unsalted butter, cut into small pieces
3 large eggs, lightly beaten
1 1/4 cups sour cream
1 1/2 tsp. vanilla extract
3 Tbsp. milk (optional)
1 1/2 cups confectioner's sugar (10X) (optional)
1 cup fresh raspberries or other fruit (optional)
Preheat oven to 350F. Butter & flour a Bundt or rosette pan.
Cream butter until smooth and gradually add 2 cups of sugar on medium speed until light and smooth, scraping down the sides of the bowl occasionally. (5-6 minutes) Add the eggs gradually and continue beating until the mixture is thick, fluffy, and doubles in volume. (4-5 minutes) Beat in sour cream and vanilla (2 minutes more).
In a separate bowl, combine 2 Tbsp. sugar, walnuts, and cinnamon. In another bowl, combine flour, baking powder, baking soda, and salt; sift the mixture twice. Carefully fold in the flour mixture with the butter mixture (half at a time) until smooth. Pour half of the batter into the prepared pan and spread to the edges. Sprinkle the cinnamon-walnut mixture evenly over the batter. Spread the remaining batter over the top, making the sides higher than the center.
Bake in the center of the oven until the top is set and springs back when touched and the cake pulls away slightly from the pan. (55-60 minutes) Let the cake cool for 1 hour. Unmold cake onto serving plate.
For Glaze: Whisk milk and confectioner's sugar until smooth. Garnish cake with fruit and drizzle glaze over cake.
Tuesday, September 26, 2006
Chicken Florentine Fettuccine Alfredo
No source for this recipe except my own head...I just came up with it one night. Not that it's anything extraordinary, but it is rather tasty. This serves 2-4 (depending on portion sizes - it was enough for dinner for the two of us and lunch for me the next day), but it's easily doubled.

1/2 lb. boneless chicken breast or tenderloin, cubed
1 tsp. minced garlic
~2 tsp. olive oil (couple of swirls around the pan, just eyeball it)
Good sized pinch of Kosher Salt & Cracked Black Pepper
1 Tbsp. butter
1/2 jar Prego Roasted Garlic Parmasean Alfredo Sauce
~1/4 cup milk (or more as needed)
1 tsp. chicken boullion granules
1 10 oz. box frozen leaf spinach, drained & chopped
1/2 pound fettuccine, cooked according to package directions
In a skillet (preferably with straight sides), saute minced garlic and chicken in the olive oil over high heat. Add salt & pepper and cook chicken until no longer pink, about 5-7 minutes. Add butter and stir to coat chicken. Turn the heat down to medium. Add half jar of alfredo sauce, milk, and chicken boullion granules. Simmer over medium heat for a few minutes. Add about 7.5 ounces of the spinach. (Adding more milk if the sauce gets too thick.) Heat spinach through and serve over prepared fettuccine.
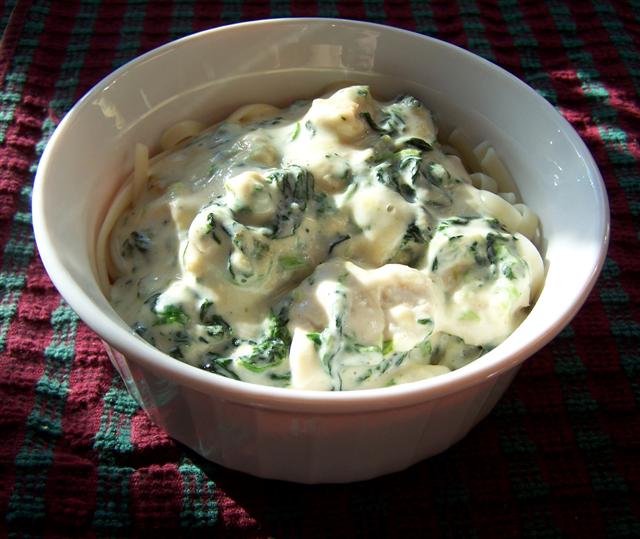
1/2 lb. boneless chicken breast or tenderloin, cubed
1 tsp. minced garlic
~2 tsp. olive oil (couple of swirls around the pan, just eyeball it)
Good sized pinch of Kosher Salt & Cracked Black Pepper
1 Tbsp. butter
1/2 jar Prego Roasted Garlic Parmasean Alfredo Sauce
~1/4 cup milk (or more as needed)
1 tsp. chicken boullion granules
1 10 oz. box frozen leaf spinach, drained & chopped
1/2 pound fettuccine, cooked according to package directions
In a skillet (preferably with straight sides), saute minced garlic and chicken in the olive oil over high heat. Add salt & pepper and cook chicken until no longer pink, about 5-7 minutes. Add butter and stir to coat chicken. Turn the heat down to medium. Add half jar of alfredo sauce, milk, and chicken boullion granules. Simmer over medium heat for a few minutes. Add about 7.5 ounces of the spinach. (Adding more milk if the sauce gets too thick.) Heat spinach through and serve over prepared fettuccine.
Friday, September 22, 2006
Five Things to Eat Before You Die...
This is a self-tagged meme (taken from Anne's Food & various other blogs - originated by Melissa at The Traveler's Lunchbox). This is hard since I love all kinds of food, but I'll give it a go.
(1) Buttermilk Biscuits & Cornbread with Home-Grown Tomatoes. Slice biscuits & cornbread in half, add butter, sliced ripe tomato, salt, pepper, and indulge. This has to be my favorite food of all time.
(2) Hazelnut Gelato. Delicious on its own, but much better if consumed in Piazza San Marco in Venice, Italy.
(3) Fresh Pineapple from Central or South America. The best I've ever had I ate in Nicaragua.
(4) Eggs Benedict. My jaw dropped when I took my first bite of Eggs Benedict at the Peter Shields Inn in Cape May, New Jersey. Mmmm...so good.
(5) Homemade Peach Cobbler. A friend of my grandmother used to make this dessert for family gatherings when I was growing up. That reminds me, I really need to get the recipe...
I have many more that I could add, so I'll probably have to do another post some time. What are your recommendations?
(1) Buttermilk Biscuits & Cornbread with Home-Grown Tomatoes. Slice biscuits & cornbread in half, add butter, sliced ripe tomato, salt, pepper, and indulge. This has to be my favorite food of all time.
(2) Hazelnut Gelato. Delicious on its own, but much better if consumed in Piazza San Marco in Venice, Italy.
(3) Fresh Pineapple from Central or South America. The best I've ever had I ate in Nicaragua.
(4) Eggs Benedict. My jaw dropped when I took my first bite of Eggs Benedict at the Peter Shields Inn in Cape May, New Jersey. Mmmm...so good.
(5) Homemade Peach Cobbler. A friend of my grandmother used to make this dessert for family gatherings when I was growing up. That reminds me, I really need to get the recipe...
I have many more that I could add, so I'll probably have to do another post some time. What are your recommendations?
Thursday, September 21, 2006
White Chocolate Cream Cheese Icing
Excellent on Carrot Cake
1 (14 oz.) package white chocolate candy wafers (or almond bark)
2 (8 oz.) packages cream cheese, softened
1 cup unsalted butter, softened
2 Tbsp. lemon juice
Melt candy wafers in the microwave using 20 second intervals. Allow coating to cool slightly, stirring occasionally (don't let it harden). In a mixing bowl, beat the cream cheese (preferably with a flat beater) until smooth and creamy. Gradually beat in the cooled coating until blended and smooth. Beat in the butter and lemon juice. After decorating your cake, refrigerate until ready to serve. Bring to room temperature 30 minutes before serving.
Yield: about 4-1/2 cups
1 (14 oz.) package white chocolate candy wafers (or almond bark)
2 (8 oz.) packages cream cheese, softened
1 cup unsalted butter, softened
2 Tbsp. lemon juice
Melt candy wafers in the microwave using 20 second intervals. Allow coating to cool slightly, stirring occasionally (don't let it harden). In a mixing bowl, beat the cream cheese (preferably with a flat beater) until smooth and creamy. Gradually beat in the cooled coating until blended and smooth. Beat in the butter and lemon juice. After decorating your cake, refrigerate until ready to serve. Bring to room temperature 30 minutes before serving.
Yield: about 4-1/2 cups
Wednesday, September 20, 2006
Excellent Day (including BBM!)
I had such an excellent day yesterday that I can’t even think of an apt title for this post. After complaining about my hair for nearly four months (according to my husband), I finally got it cut during lunch...10+ inches to donate to Wigs for Kids. I absolutely love the way it looks & feels now. 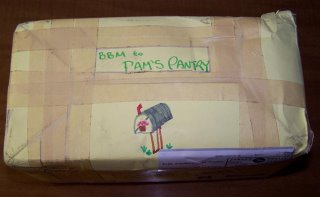 But, that was only part of my excellent day. I arrived home after work to find my Blogging By Mail package had arrived! Brilynn from Jumbo Empanadas even included the BBM logo on the outside! Good things do come in small packages! I have never in my life seen such a well-packed box. How did she fit everything in there?! Oh, but you’re wondering what was in the box, right? Well, take a look...
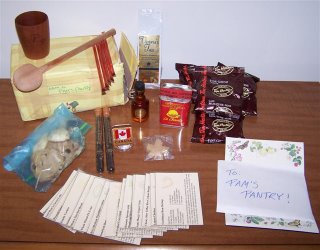
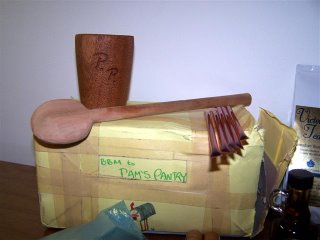 As I’m sure many of us are, I’m a recipe collector, and these sound incredible! (I apologize for the plethora of exclamation marks, but I’m just too excited…) I mean, who wouldn’t love to try these right this minute: Caribbean Rum Shrimp, Chewy Skor Toffee Bits Cookies, Aunt Marg’s Yogurt Cake, Brussels Sprouts with Maple & Walnut Vinaigrette, Grilled Corn Salad, Aunt Susan’s Hash Brown Potatoes, Bri’s Mexican Chocolate Cookies, Whole Wheat Pie Crust, Mom’s Zucchini Bread, Family Cookies, and Aunt Rose’s Carrot Cake. YUM!


The funny thing was that I read Bri’s post about her BBM package, and when I saw the wooden bowl, I thought, “Hey, those are my initials.” Then, “What a great idea! That’s going to be a lovely gift, but I’m sure it’s for another BBM participant.” I noticed the Smoked Paprika (which I've been seeking as of late, to no avail) and thought the same thing. Little did I know the bowl and other package contents were on their way to Pam’s Pantry!
Before I turn this post into a novel, I want to say Thank You, Thank You, Thank You to Jumbo Empanadas!!! And, Thank You, Thank You, Thank You to Stephanie at Dispensing Happiness for coordinating everything. But, I do have a question...when is the next one & where do I sign up?
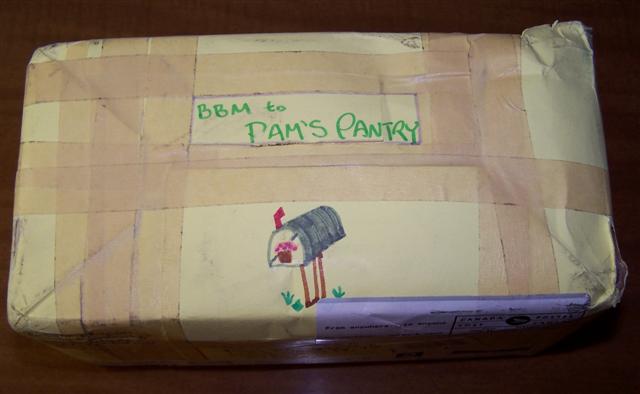 But, that was only part of my excellent day. I arrived home after work to find my Blogging By Mail package had arrived! Brilynn from Jumbo Empanadas even included the BBM logo on the outside! Good things do come in small packages! I have never in my life seen such a well-packed box. How did she fit everything in there?! Oh, but you’re wondering what was in the box, right? Well, take a look...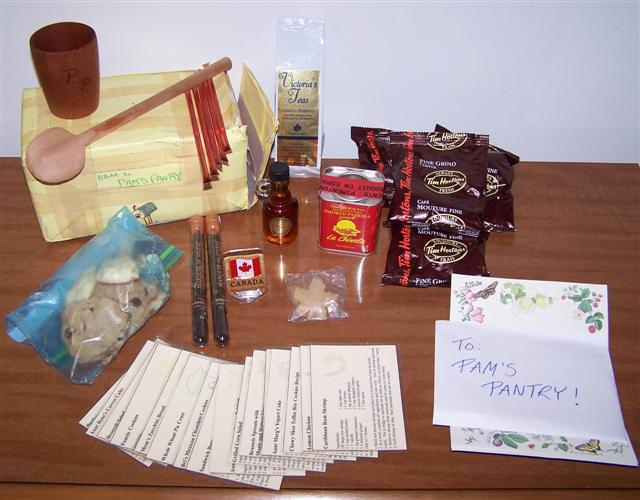
Homemade Chocolate Chip Cookies & Lime CookiesWhat a perfect assortment of goodies! The bowl & spoon are wonderful and absolutely ideal as I have a very strong interest in wood turning (no lathe yet, but it’s on the list for next year...maybe even Christmas).
Handmade wooden bowl & spoon (with my initials!)
Maple & Niagara Ice Wine Tea (in the glass tubes)
Canadian Blueberry Tea (white bag)
Small Jug of Canadian Maple Syrup
Maple Candy (shaped like a maple leaf!)
Four (4!) Packages of Tim Horton’s Coffee
Five (5!!) Sour Cherry Honey Sticks
Smoked Paprika
Canadian Flag Magnet (to hold my recipes, of course)
Sixteen (16!!!) Laminated Recipe Cards (including some family recipes!)
 As I’m sure many of us are, I’m a recipe collector, and these sound incredible! (I apologize for the plethora of exclamation marks, but I’m just too excited…) I mean, who wouldn’t love to try these right this minute: Caribbean Rum Shrimp, Chewy Skor Toffee Bits Cookies, Aunt Marg’s Yogurt Cake, Brussels Sprouts with Maple & Walnut Vinaigrette, Grilled Corn Salad, Aunt Susan’s Hash Brown Potatoes, Bri’s Mexican Chocolate Cookies, Whole Wheat Pie Crust, Mom’s Zucchini Bread, Family Cookies, and Aunt Rose’s Carrot Cake. YUM!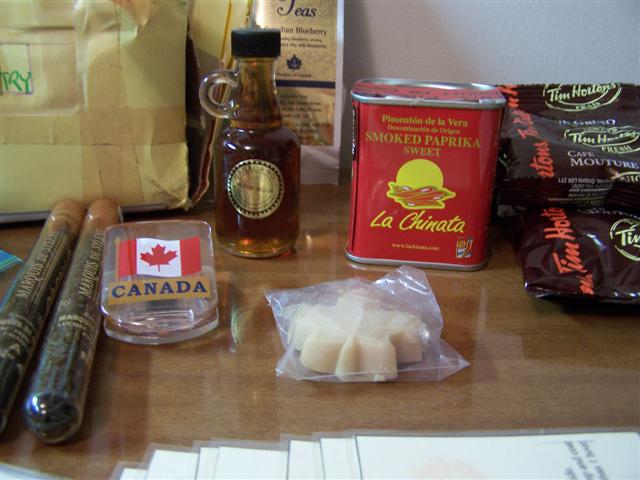
The funny thing was that I read Bri’s post about her BBM package, and when I saw the wooden bowl, I thought, “Hey, those are my initials.” Then, “What a great idea! That’s going to be a lovely gift, but I’m sure it’s for another BBM participant.” I noticed the Smoked Paprika (which I've been seeking as of late, to no avail) and thought the same thing. Little did I know the bowl and other package contents were on their way to Pam’s Pantry!
Before I turn this post into a novel, I want to say Thank You, Thank You, Thank You to Jumbo Empanadas!!! And, Thank You, Thank You, Thank You to Stephanie at Dispensing Happiness for coordinating everything. But, I do have a question...when is the next one & where do I sign up?
Tuesday, September 19, 2006
Carrot Cake (with White Chocolate Cream Cheese Icing)
4 eggs
1 cup vegetable oil
1 tsp. vanilla extract
2 cups all-purpose flour
2 cups sugar
2 tsp. baking soda
2 tsp. cinnamon
1/4 tsp. each nutmeg, cloves, allspice and salt
4 cups (approx. 1 lb.) grated carrots
2/3 cup chopped nuts
1/2 cup raisins
1/2 cup crushed pineapple, drained
Preheat oven to 350F. Butter and flour two 9-inch round pans. In a large mixing
bowl, beat eggs until foamy; add oil and vanilla and beat well. Mix flour, sugar, baking soda, cinnamon, nutmeg, cloves, allspice and salt together; add to egg mixture and mix well. Fold in carrots, nuts, raisins and pineapple. Pour into prepared pans and bake 30-35 minutes or until toothpick inserted in center comes out clean. Cool 10 minutes in pans on cooling grid and invert on grid to cool. Assemble & frost with White Chocolate Cream Cheese Icing.
Makes 5 1/2 cups batter.
1 cup vegetable oil
1 tsp. vanilla extract
2 cups all-purpose flour
2 cups sugar
2 tsp. baking soda
2 tsp. cinnamon
1/4 tsp. each nutmeg, cloves, allspice and salt
4 cups (approx. 1 lb.) grated carrots
2/3 cup chopped nuts
1/2 cup raisins
1/2 cup crushed pineapple, drained
Preheat oven to 350F. Butter and flour two 9-inch round pans. In a large mixing
bowl, beat eggs until foamy; add oil and vanilla and beat well. Mix flour, sugar, baking soda, cinnamon, nutmeg, cloves, allspice and salt together; add to egg mixture and mix well. Fold in carrots, nuts, raisins and pineapple. Pour into prepared pans and bake 30-35 minutes or until toothpick inserted in center comes out clean. Cool 10 minutes in pans on cooling grid and invert on grid to cool. Assemble & frost with White Chocolate Cream Cheese Icing.
Makes 5 1/2 cups batter.
Thursday, September 14, 2006
Pineapple Cream Muffins
I received mixed reviews on this one, but I really liked them. Contrary to most other foods, these are not better straight from the oven. Instead, make them the night before and refrigerate them to enjoy the next morning.
2 cups flour
2 tsp. baking powder
1/2 tsp. baking soda
3 1/2 ounces instant vanilla pudding (can use regular or sugar-free)
2/3 cups brown sugar
1 egg, beaten
1 cup sour cream (regular or low-fat)
1 8-ounce can crushed pineapple, with juice
1/2 cup oil
Preheat oven to 425F. Spray muffin cups or pan with nonstick cooking spray.
In a large bowl, sift together the flour, baking powder, baking soda, pudding mix, and stir in brown sugar.
In a separate bowl, combine the egg and sour cream. Fold in the pineapple and oil. Add the egg-pineapple mixture to the flour mixture, stirring until moistened. Batter will be thick. Spoon into muffin cups and bake for ~15 minutes or until toothpick comes out clean when inserted. (Muffins should be golden brown.) This recipe makes ~15 muffins. (I don't know why the odd amount, but you may want to bake in 2 batches for even cooking.)
Recipe from The Lamplighter Bed & Breakfast
2 cups flour
2 tsp. baking powder
1/2 tsp. baking soda
3 1/2 ounces instant vanilla pudding (can use regular or sugar-free)
2/3 cups brown sugar
1 egg, beaten
1 cup sour cream (regular or low-fat)
1 8-ounce can crushed pineapple, with juice
1/2 cup oil
Preheat oven to 425F. Spray muffin cups or pan with nonstick cooking spray.
In a large bowl, sift together the flour, baking powder, baking soda, pudding mix, and stir in brown sugar.
In a separate bowl, combine the egg and sour cream. Fold in the pineapple and oil. Add the egg-pineapple mixture to the flour mixture, stirring until moistened. Batter will be thick. Spoon into muffin cups and bake for ~15 minutes or until toothpick comes out clean when inserted. (Muffins should be golden brown.) This recipe makes ~15 muffins. (I don't know why the odd amount, but you may want to bake in 2 batches for even cooking.)
Recipe from The Lamplighter Bed & Breakfast
Tuesday, September 12, 2006
Bacon & Baked Potato Soup
From KraftFoods.com
1 Tbsp. butter or margarine
1/4 cup chopped onion
1/4 cup chopped celery
1 can (14-1/2 oz.) reduced sodium chicken broth
1 1/4 cups milk
2 medium baking potatoes, baked, cut into 1/2-inch cubes (I don't peel mine)
1/4 tsp. salt
1/8 tsp. pepper
8 slices bacon, crisply cooked, crumbled and divided
3/4 cup shredded cheese (any kind you like)
2 Tbsp. green onions, sliced, divided
1/4 cup sour cream
Melt butter in heavy saucepan or Dutch oven. Add onion and celery; cook and stir until crisp-tender. Add broth, milk, potatoes, salt and pepper; bring just to boil, stirring constantly. Slightly crush potatoes with back of spoon. Reduce heat to medium-low; simmer 5 minutes, stirring frequently.
Reserve 2 Tbsp. each of the bacon and cheese and 1 Tbsp. of the green onion for toppings; set aside. Add remaining bacon, cheese and green onion to soup just before serving; cook until cheese is melted, stirring constantly.
Serve topped with reserved bacon, cheese, green onion, and sour cream.
1 Tbsp. butter or margarine
1/4 cup chopped onion
1/4 cup chopped celery
1 can (14-1/2 oz.) reduced sodium chicken broth
1 1/4 cups milk
2 medium baking potatoes, baked, cut into 1/2-inch cubes (I don't peel mine)
1/4 tsp. salt
1/8 tsp. pepper
8 slices bacon, crisply cooked, crumbled and divided
3/4 cup shredded cheese (any kind you like)
2 Tbsp. green onions, sliced, divided
1/4 cup sour cream
Melt butter in heavy saucepan or Dutch oven. Add onion and celery; cook and stir until crisp-tender. Add broth, milk, potatoes, salt and pepper; bring just to boil, stirring constantly. Slightly crush potatoes with back of spoon. Reduce heat to medium-low; simmer 5 minutes, stirring frequently.
Reserve 2 Tbsp. each of the bacon and cheese and 1 Tbsp. of the green onion for toppings; set aside. Add remaining bacon, cheese and green onion to soup just before serving; cook until cheese is melted, stirring constantly.
Serve topped with reserved bacon, cheese, green onion, and sour cream.
Thursday, September 07, 2006
Peanut Butter Brownies
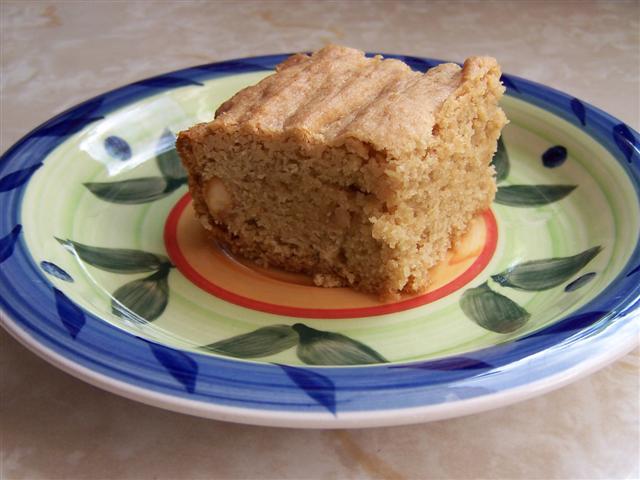
1/2 c. peanut butter
2/3 c. sugar
2 eggs
1 c. all-purpose flour
1/4 tsp. salt
1/3 c. butter
1/2 c. firmly packed dark brown sugar
1/2 tsp. almond or vanilla extract
1 tsp. baking powder
1/3 cup roasted peanuts, chopped (optional)
Combine peanut butter and butter, blending well. Gradually add sugar, beating until light and fluffy. Add eggs, beating well. Stir in almond extract. Combine flour, baking powder and salt. Add to creamed mixture; stir well. Toss in roasted peanuts (if using). Spread mixture evenly into a greased 9" square pan. Bake at 350F for 30-35 min. Cool completely in pan and cut into squares.
To double: use 1 cup of sugar and 1 cup lightly packed dark brown sugar. Bake in jelly roll pan for thinner brownies, or a 9x13 pan for thicker brownies.
Tuesday, September 05, 2006
Cappuccino Biscotti

2 cups flour
1 cup sugar
1/2 tsp baking soda
1/2 tsp baking powder
1/2 tsp salt
1/2 tsp cinnamon
1/2 tsp cloves, ground
1/4 cup brewed espresso, cold
2 tablespoons milk or cream
1 egg yolk
1 tsp vanilla
3/4 cup hazelnuts, toasted, skinned and chopped
In the bowl of an electric mixer fitted with the paddle attachment, blend the flour, the sugar, the baking soda, the baking powder, the salt, the cinnamon and the cloves until the mixture is combined well. In a small bowl whisk together the espresso, the milk, the yolk and the vanilla, adding the mixture to the flour mixture , beating until a dough is formed, and stir in the hazelnuts.
Turn out the dough onto a floured surface, knead it several times and halve it. Working on a large buttered and floured baking sheet, with floured hands, form each piece of dough into a log 12 inches long by 2 inches wide and arrange the logs at least 3 inches apart on the sheet. Flatten logs slightly.
Bake the logs in a preheated 350F oven for 35 minutes and let them cool on the baking sheet on a rack for about 10 minutes. Reduce the oven temperature to 300F. On a cutting board, cut the logs crosswise on the diagonal into 3/4 inch slices , arrange the biscotti, cut sides down, on the baking sheet, and bake them for 5 to 6 minutes on each side, or until they are pale golden. Transfer the biscotti to racks to cool.
From BakingBits.com
Friday, September 01, 2006
Chocolate Raspberry Meringue Cookies
3 egg whites
1/8 tsp. salt
3 1/2 Tbsp. raspberry gelatin
3/4 cup granulated sugar
1 tsp. vinegar
1 cup mini chocolate chips
Beat egg whites with salt until foamy. Add gelatin and sugar gradually. Beat until stiff, about 15 minutes.
Mix in vinegar, and fold in chocolate chips. Drop rounded teaspoons of dough onto parchment-lined baking sheets. Bake at 250F for 25 minutes; then, turn off the oven. Leave in the oven an additional 20 minutes.
1/8 tsp. salt
3 1/2 Tbsp. raspberry gelatin
3/4 cup granulated sugar
1 tsp. vinegar
1 cup mini chocolate chips
Beat egg whites with salt until foamy. Add gelatin and sugar gradually. Beat until stiff, about 15 minutes.
Mix in vinegar, and fold in chocolate chips. Drop rounded teaspoons of dough onto parchment-lined baking sheets. Bake at 250F for 25 minutes; then, turn off the oven. Leave in the oven an additional 20 minutes.
Monday, August 28, 2006
Blogging By Mail
I managed to squeeze in before the deadline for the upcoming Blogging By Mail event. Stephanie from Dispensing Happiness is the coordinator for this unique event. Food bloggers from all over the world are participating in a food care package "swap" of sorts. You are paired up with another blogger for the exchange (and, you don't have to worry about posting your "real" info online anywhere). I've already planned what I'm going to send for my first BBM package, but I haven't had a chance to make anything yet.
I'm really excited about this event. After all, who wouldn't want homemade goodies or something unique/different to try? And, who doesn't love care packages in the mail? I'll post what I send & receive in the coming weeks.
I'm really excited about this event. After all, who wouldn't want homemade goodies or something unique/different to try? And, who doesn't love care packages in the mail? I'll post what I send & receive in the coming weeks.
Subscribe to:
Posts (Atom)